
Quick Start Guide
Copyright 2009
American Printing House for the Blind, Inc.
Thank you for purchasing Book Port Plus. This Quick Start explains the basic operations. Please see the Book Port Plus User Guide for more details.
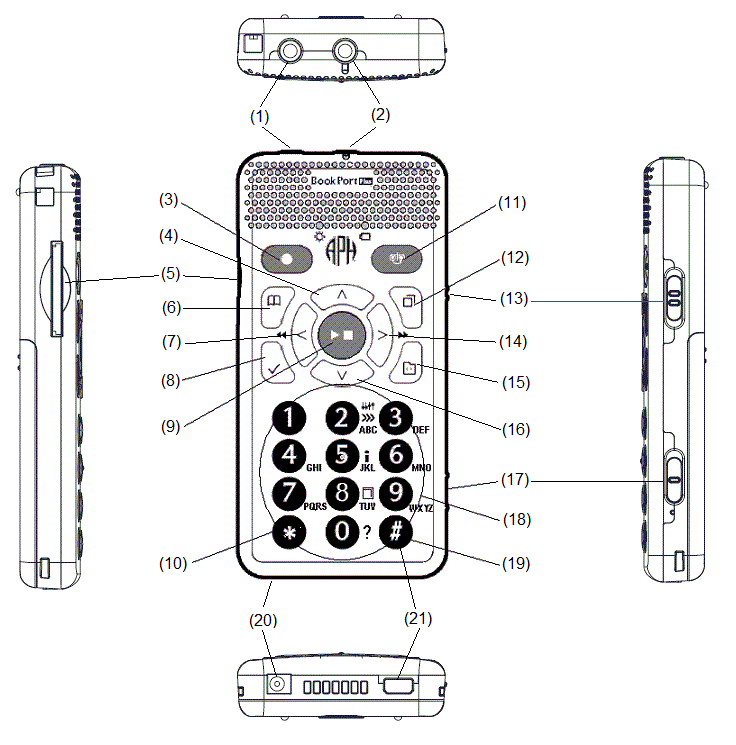
Name of keys
(1) Microphone jack
(2) Earphone jack
(3) Record key
(4) Up key
(5) SD Card Slot
(6) Go to key
(7) Left key
(8) Bookmark key
(9) Play/Stop key
(10) * key
(11) Power key
(12) Menu key
(13) Volume button
(14) Right key
(15) Title key
(16) Down key
(17) Key lock switch
(18) Number keys
(19) # key
(20) AC jack
(21) USB port
Unpack all materials.
Set up player, battery and AC charger.
| Procedure | |
|---|---|
| Turn the player over and make sure the two small projections at the top are facing up. Using two hands, press the rectangular button at the bottom of the player and the two ribs in the middle of the player; slide the cover toward the bottom of the unit and remove it completely. | 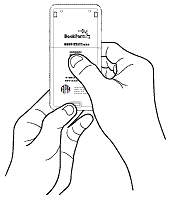 |
| Place the battery in your left hand and orient it so that two projections are on the right side of the battery and one small projection is at the bottom left side of the battery. | 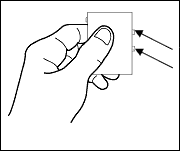 |
| Gently slide the battery into the player toward the right side of the opening until it clicks into place. Do not force it. Note that the battery cannot be inserted toward the left. | 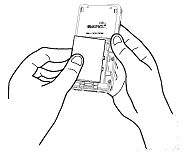 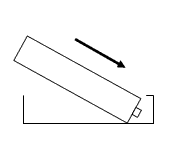 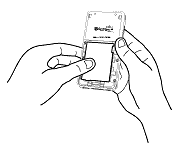 |
| To close the battery cover, place the cover about 5mm below the closed position. Slide the cover up, making sure it locks into place. | 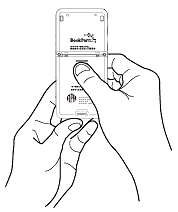 |
| Turn the player over so the front side faces up. Plug the AC charger into the AC jack located at the left bottom edge of the player. Charge the battery fully the first time you use the player. This takes about 4 hours. You can use Book Port Plus while it charges. | 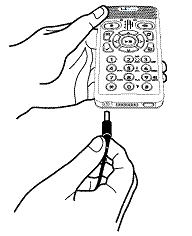 |
To remove the battery, please refer to the User Manual.
| Insert the SD card into the card slot located near the top of the left edge. The front of the SD card has a smooth surface and the back is ribbed at one edge. Orient the SD card so that the cut corner is at the bottom right. Insert the SD card into the card slot, press it firmly and then release. | 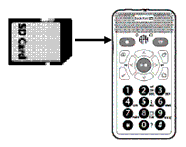 |
| To remove the SD card, press in the center of the card toward the right side of the device until you feel the spring action release it. It should pop out a little from the slot. Grasp and pull it to the left to remove it completely. |  |
To lock/unlock player, slide the Key lock switch up/down.
| Procedure | |
|---|---|
| 1 | Slide the Key lock switch up to lock the player*. |
| 2 | Slide the Key lock switch down to unlock the player. |
*If the lock is applied, all keys and controls will not function including the Power key.
To turn on/off the player, press and hold the Power key.
| Procedure | |
|---|---|
| 1 | Press and hold the Power key for about 2 seconds* to turn the player on. |
| 2 | Press and hold the Power key at least 2 seconds to turn the player off. |
*If the Power key is pressed less than 1.5 seconds, it works as a sleep timer.
*When the player is turned on the first time after the battery is inserted or after the device is turned off, it takes about 30 seconds before the player is ready to use.
Download and store DAISY books, audio files, and text files on the SD card before playback.
| Playback procedure | |
|---|---|
| 1 | Insert the SD card and turn the player on. |
| 2 | Press Title key until "SD card " is announced. |
| 3 | Select DAISY book, audio file or text file pressing Right key or Left key. |
| 4 | Press Play/Stop key to start playback. |
| 5 | Press Play/Stop key again to stop playback. |
| 6 | Press and hold Power key to turn off. |
Record with the built-in microphone.
| Procedure | |
|---|---|
| 1 | Confirm that the SD card is inserted in its slot. |
| 2 | Press the Record key. Player enters test recording mode. |
| 3 | Press the Record key to start recording. |
| 4 | Press the Record key to pause recording. |
| 5 | Press the Record key again to resume recording. |
| 6 | Press the Play/Stop key to finish recording. |
Move by fast forward/rewind
| Procedure | |
|---|---|
| 1 | Select a DAISY book. |
| 2 | Press Play/Stop key to start playback. |
| 3 | Press and hold the Right key to fast forward or press and hold the Left key to rewind. The player announces 5 seconds, 10 seconds, 20 seconds, 30 seconds, 1 minute, 5 minutes, 10 minutes, 20 minutes and so on. If the key is released before the 10 minute increment, playback starts at the place the key is released. If the key is released after the 10 minute increment, FF/REW continues and you must press Play/Stop key to stop. |
Move by Table of Contents key
| Procedure | |
|---|---|
| 1 | Select a DAISY book. |
| 2 | Press Play/Stop key to start playback. |
| 3 | Select navigation level by repeatedly pressing 8 key. |
| 4 | Press 9 key to move forward or 7 key to move back. |
*Navigation levels of DAISY books are: "Section (Levels 1 to 6), group, page, phrase, bookmark"
Audio file: "Album, track, bookmark"
Text file: "Level (HTML only), bookmark"
Direct jump to page/heading
Example: Moving to page 20.
| Procedure | |
|---|---|
| 1 | Select a DAISY book. |
| 2 | Press Go to key* |
| 3 | Input page number with the 2 & 0 keys. |
| 4 | Press the Play/stop key or the Down key to jump to page 20. Playback starts automatically. |
*To move to a heading, press the Go to key twice.
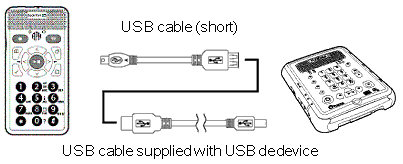
To playback contents in USB flash or USB devices, use the short USB cable. First, turn the player off. Plug the smaller end of the connector into the player and plug the USB memory/device into the larger connection of the USB cable. Turn the player on. Confirm that the player announces "USB" when the Title key is pressed.
Connect USB Flash

Connect USB devices
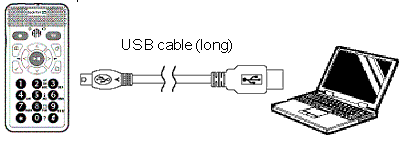
Use the long USB cable to transfer data to and from a computer. Turn the player off and insert the SD card. Connect the small end of the USB cable to the player, and the larger cable end to the computer. Turn the player on. Use the usual computer commands to transfer data to and from the computer.
2009-12-18