Orientation and Mobility Family Booklet


Copyright (c) 2010
Last updated: 2010.05.20


Copyright (c) 2010
Last updated: 2010.05.20
Fabiana Perla, Ed.D. COMS, and Betsy O'Donnell, MS, COMS, noted authors and presenters in the orientation and mobility field, have authored all of the information about orientation and mobility included in this software. However, you, the orientation and mobility instructor, always have a choice about whether to include specific information in a particular family booklet. You are responsible for all information that you include in the booklet regardless of whether it is authored by you or by the software authors.
We wish to thank Tad Kosanovich, OD, vision rehabilitation specialist, and member of the American Optometric Association Vision Rehabilitation section, in private practice in Englewood, Florida, for his review of the eye condition definitions used in this software. His kindness and assistance was invaluable.
We also wish to thank our programmer, John Hedges, for his patience and creativity throughout the development process. Our appreciation goes out to all of the orientation and mobility instructors, consumers, and others who field tested this software and helped us make it really do what we hoped it would.
This software helps you create an orientation and mobility booklet for the families of your students. The software will print the customized booklet on standard 8.5" X 11" paper. You will need to place the booklet into a three-ring binder or clip it into a binding and cover of your choice. You will also need to provide a self-addressed envelope at the end of the booklet so that the student's family can return the Family Contact Form to you.
A pilot project directed by Fabiana Perla, COMS and Betsy O'Donnell, COMS took place in 2000 with parents of children at St. Lucy Day School for Children with Visual Impairments in Upper Darby, Pennsylvania. The project consisted of a workshop for parents, a series of telephone interviews, and the development of individualized O&M booklets. Constructive feedback on the usefulness of the booklets was incorporated into the final version of the O&M Family Booklet produced by this software.
Families can be very powerful sources of incidental learning for children with visual impairments and can play a major role in expanding children's application of orientation and mobility skills beyond the scope of O&M lessons. In 2002, Fabiana Perla and Betsy O'Donnell approached the American Printing House for the Blind about collaborating in the development of software designed to help orientation and mobility instructors create family booklets that would provide families with the information they need to foster their children's incidental learning and independence.
The purpose of Orientation and Mobility Family Booklet software is to help you provide your students' families with meaningful explanations of orientation and mobility and its relevance in their children's lives. The booklet produced by using the software summarizes a student's O&M progress and goals; and it also helps the parents foster their child's independence in everyday life.
The orientation and mobility (O&M) family booklet can be a wonderful way to introduce yourself and establish a partnership with families of your students. You may find that parents, once they have a comprehensive understanding of orientation and mobility, become more interested in and better advocates of their children's mobility needs. This booklet may also be used by families when sharing information about their children with relatives, friends, and professionals such as school teachers and sports coaches.
We suggest the following uses for this booklet:
To encourage effective communication between O&M specialists and families
To better educate families about the specific O&M-related needs of their children
To assist parents in incorporating O&M into everyday life
The booklet produced using this software can contain any or all of the material outlined below. You can customize each booklet by omitting topics, editing information, or adding your own comments so that the final product meets the individual needs of a student and his/her family.
Booklet Introduction: includes your name and contact information, your greeting to the family, and O&M lesson times for this student.
Welcome to the World of Orientation and Mobility (O&M): explains the purpose of the O&M booklet to your student's family, provides a definition of O&M in language that families can understand, and identifies the main areas of instruction.
Eye Conditions: includes information on your student's eye condition(s) in layman's terms.
Visual Functioning: explains general terms such as visual acuity, visual fields, and depth perception; and outlines your student's level of visual functioning, including vision fluctuations, lighting and glare problems, use of sunglasses or optical devices, and whether a low vision evaluation is recommended.
Additional Impairments: describes any additional disabilities that your student may have, the impact of these impairments on orientation and mobility, and general strategies to minimize this functional impact.
Specific Goals: lists your student's specific O&M goals for the current year.
Orientation and Mobility Skills: covers your student's progress in areas such as concept development, O&M skills and techniques, sensory training, visual efficiency, and social skills.
General Strategies for Promoting Independence: provides general guidelines and ideas to encourage independence and understanding of the world at large, including concrete strategies for taking advantage of teachable moments, exposing children to new environments, and helping children participate in physical activities.
Specific Activities for Promoting Independence: provides a list of suggested games and activities that you can adapt to meet the individual needs of your student and his/her family.
We view this booklet as part of an ongoing communication approach that may include home visits, telephone calls, meetings, and written communication. It is in this context that families are more likely to better understand the particular mobility needs of their children and develop greater confidence in participating in the O&M process. We suggest contacting the family before sending the booklet and maintaining ongoing communication afterwards. Additional strategies for effective collaboration include:
At the beginning of the school year, let parents know how you can be reached. Encourage them to contact you to share information or concerns.
Prior to an IEP meeting, contact the student's parents or guardians to obtain their input and discuss goals for the coming year.
Use phone calls, e-mail, or letters to share the student's accomplishments and to get feedback, not just to report problems. E-mail is very useful when people have different schedules. It is also less time consuming (e.g., the same message may be sent to more than one family), and provides useful written documentation.
Parents and O&M instructors can pass a communication book back and forth to record or update information and ask/answer questions. In addition, the book can be used for homework assignments. For example, when working on identifying shapes in the environment, the O&M specialist could suggest a treasure hunt at home for finding shapes around the block.
In households where parents are not available, try to involve guardians or siblings.
Invite family members to observe mobility lessons. It is important to extend the invitation to individuals such as siblings and grandparents who might also be involved.
Try to attend parent-teacher conferences. Although O&M parent conferences are not common, it may be possible to join the school's regular parent-teacher conferences or organize your own "open house" event, possibly with other vision professionals, at your place of employment.
Newsletters or web sites can be used to educate families and other professionals on O&M topics, events, and available resources.
Develop an "O&M Portfolio" with your student. Include mementos from lessons (such as train tickets, receipts from stores, photographs of mobility-related activities, or tactual/visual maps) and progress in certain areas (such as ability to cross certain types of intersections or solicit assistance). The portfolio could be taken home several times a year with a feedback sheet on which family members can write comments or questions.
Whether to complete an O&M Family Booklet on every student and how often to update the booklet are important questions only you can answer. You may consider creating a booklet for each new family on your caseload after completing a comprehensive evaluation; or you may initially select those families that you think could benefit the most from the information in the booklet and then gradually include others. Periodically, you may need to update a booklet to reflect significant changes in your student's circumstances or O&M needs. Changes in age or skill level may only call for an update of selected areas of the booklet.
This software makes it easy for you to update a booklet, since it stores the information for every booklet you create on your hard drive. Each time you make changes to a booklet, the system automatically saves the change and updates the date that will appear on the cover page when the booklet is printed.
Now that you have a better idea of what this software can do for you and your students, it's time to get the software up and running. In order to use this software effectively, you must have the following:
PC running Windows 2000, XP, Vista, 7 or later
Microsoft Net Framework 2.0
Internet Explorer 5.01 or later (7.0 or later recommended)
CD-ROM drive
If you are installing O&M Family Booklet on a shared PC, make sure that the person installing the software has administrative rights to install.
Close any open programs before installing or updating O&M Family Booklet. You will receive an error/unable to install message if you try to install the program with any other program open.
Once the setup process starts, follow the instructions displayed on the screen. Before you can proceed with Setup, you must agree to the End User License Agreement. Once the software is installed, you will not need the CD to use the program.
To start the software, find its icon on the desktop or go to the Start Menu, and open the programs folder. After locating the program on the desktop or Start Menu, double click the program to open it. Alternatively, you can use the arrow keys to find the program and press enter.
The remainder of this manual includes
An explanation of each screen involved in creating or editing a booklet along with the menu item that will take you to the screen
A discussion of menu items that do not correspond to screens used in creating a booklet
Four resource documents containing information for use when completing family booklets, which are also accessible from within the software
Appendix A that explains tokens used in edit fields and that provides a list of all tokens used in this software
Appendix B that includes the complete list of Strategies for Promoting Independence for Students with Visual Impairments.
Appendix C that includes the complete list of Strategies for Promoting Independence for Students with Multiple Impairments
Appendix D that includes the complete list of Activities for Promoting Independence
Appendix E that includes the complete Sample Booklet used as an example in the software.
Although you may be able to use the program intuitively, information contained in the following pages will help you make better use of the software. The first screens of the program request information about you, the instructor; and the remaining screens request information about the student. Instructor screens can be accessed from anywhere in the program by selecting items on the Instructor Menu; and the student screens can similarly be accessed from anywhere in the program by selecting items on the Student Menu.
Many instructors can use this software on one computer. The software uses a login and password system, with each user having a unique user name and password. When you log in to the program, you can see only those booklets that you have created. You can't see booklets created by other instructors; and other instructors can't see booklets that you have created. Later, we will describe the method for transferring booklets from one instructor to another. This might need to happen when a student is transferred from you to another instructor.
All screens that deal with student information also display text as it will appear in the family booklet. After you edit, add, or delete specific information, the family booklet text on the screen will reflect your changes. Before moving to the next screen, you may wish to review the booklet text to make sure that it says what you intend. When you have completed a book, we recommend that you review all screens to make sure that you have not omitted any sections accidentally.
If you are confused by any instructor or student-related screen, pull down the Help Menu, and click the Context Help button. This brings you immediately to the section of this manual dealing with your current screen. After reading the manual, return to the screen by clicking the x in the help window or by pressing the escape key.
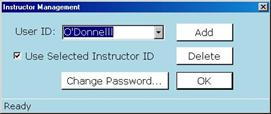 The Instructor Management screen is the first screen to appear after the program's initial splash screen. The Instructor Management screen can also be accessed from the Instructor Menu, Management item.
The Instructor Management screen requires you to sign in with a user name and password. When you sign in to the program for the first time, the sign in dialog requires you to enter your password twice, and provide a challenge question and answer to be used to verify your identity in case you forget your password. Make sure that you provide a question with one obvious answer that you will not forget and that no one else knows. This process will be explained in more detail shortly.
After you have signed in, you will have access to any family books that you have created or are in the process of creating. The way your user name is obtained depends on how you access the computer on which the software resides.
If you work on a computer shared by other users, or if your computer is connected to a network of other computers, you are likely to have a separate profile for your work created on the computer. When you must provide a user name and password to begin using a computer, you are probably using a Windows-based user name and password. If you have a Windows user name and are logged in to Windows, the O&M Family Booklet software places your Windows user name in the name box on the Instructor Management screen. If someone else is logged in to the computer, you should log in under your own user name before opening the program.
As stated previously, the Instructor Management screen requires that you create a password and a challenge question/answer to be used if you forget your password. In order to protect your Windows user profile, do NOT use your Windows login password for this software. Instead, create a password to be used only for the O&M Family Booklet.
There are a few sets of circumstances in which you may not have a Windows login name and password. If you are the only person using the computer and your computer is not on a school or work network or if a number of people share a computer which is not set up with individual login profiles for individual users, you probably don't have a personal Windows login.
If you do not have your own Windows profile and user name, you will need to create a user name for identification (ID) as well as a password. Make sure that your user name is easy to remember and recognize.
If you have not used the program before and another name appears in the User Name box on the Instructor Management screen, click the Cancel button on this screen. When the menu bar appears, click Instructor and then click Management. Write your new user name in the User Name box on this screen, and click add.
Because this is the first time you have used the program, basic information about you is not yet stored in the software. After you click Add, the Instructor Information screen will automatically appear and will guide you through the process of entering your name, credentials, and contact information. After clicking OK, you will be returned to the Instructor Management screen. Here you will see the message, "No password created, click set password." After clicking the Set Password button, you will enter a password, reenter it for verification, and provide a secret question and its answer. If you forget your password, you can click Forgot Password on the Instructor Management screen. You will then be asked the secret question; if you enter the correct answer to this question, you will be able to reset your password. Press OK, and you will be returned to the login dialog where you can now enter your new password and begin using the program.
If you have used this software on this computer before and another name appears in the User Name box, simply click inside the box and then click on your name when it appears. You will then type in your password in the usual way.
If you check this box, the currently selected instructor ID will always be selected when the program is reopened. In other words, the ID of the instructor who used the program last will be selected on the login screen the next time the program is opened. If you are not that instructor, you need only click inside the name box to pull down the list of all instructor IDs (yours included) that have been established. If you leave this checkbox unchecked, the ID of the person logged onto Windows will always appear in the Instructor Name box on a new login screen when the program is opened. You can still click inside the box to pull down the list of instructor IDs that have been established (yours included) and proceed with your login. However, if you do not have a Windows login user name and password and if you are the primary person using this software, you might find it more convenient to check this checkbox so that your instructor ID always appears when you open the program.
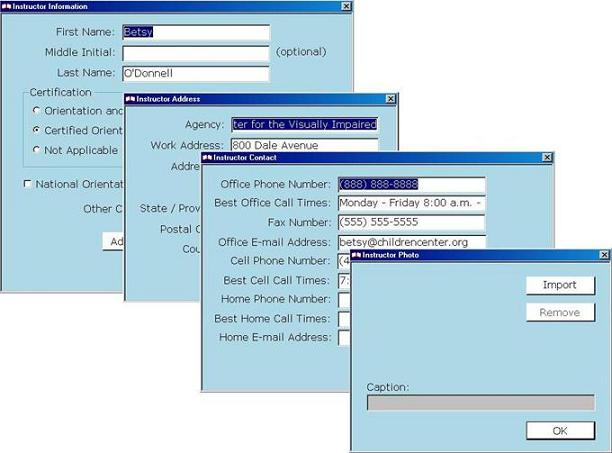 The Instructor Information screen mentioned above appears automatically when you enter a new user name and click add. You can also access this screen from anywhere in the software by clicking the Information item in the Instructor Menu.
This screen presents you with forms for collecting your name, credentials, workplace, address, phone numbers, and best times to contact you. This material will be saved as part of your instructor information; and the program will then insert this information in the appropriate places in all of the family booklets that you create.
The Instructor Information screen contains six fields and three buttons.
The six fields include:
First Name
Middle Initial
Last Name
A choice of Orientation and Mobility Specialist, Certified Orientation and Mobility Specialist, or Not Applicable
National Orientation and Mobility Certificand (NOMC) (Because the NOMC credential may be held by persons who are not called O&M specialists and by persons who are certified O&M specialists, NOMC can be checked regardless of which of the previous three options has been selected).
Other Credentials
The Address button, when pressed, brings up the following fields:
Agency: school or agency for which you work or with which you are contracted
Work Address: mailing address first line
Address2: second line of mailing address)
City
State/Province: write in or use the state pull-down list
Postal Code
Country: default is United States
The contact button, when pressed, brings up a dialog with the following fields:
Office Phone Number
Best Office Call Times
Fax Number
Office e-mail Address
Cell Phone Number (optional)
Best Cell Call Times
Home Phone Number (optional)
Best Home Call Times
Home e-mail Address (optional)
The photo button, when pressed, brings up the Instructor Photo screen. You can use the Import button to select a photo. When pressed, an open file dialog with an edit field for the file pathname for an electronic photo appears. You can also browse through folders on the computer to locate your photo. If you upload a digital picture of yourself to be saved in the software, you will be asked whether you want to include the photo each time you create a booklet. Although it is saved by the software, you can decide whether to include it on a case-by-case basis. The software will also ask you if you want to paste a paper photo of yourself into the printed booklet.
Remember that you need only enter information that you want your student's family to have and use. Also remember that you can remove information from a family book even though you have entered it here. For example, although you don't want to give your home phone number to most families, you might want to share it with one student's family because the student's parent works third shift, sleeps during the day, and can only make phone calls in the evening when you are home. If you enter your home phone number in this form, the software allows you to easily remove it from family books in which you don't want it to appear.
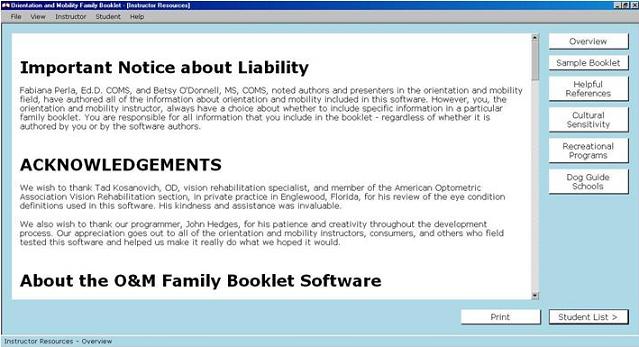 After you have signed in to the program and, for first-time users, have provided your instructor information, you are automatically taken to the Instructor Resources Screen. This screen contains the following buttons:
Overview: Pressing this button takes you to sections of the software manual about the history, purpose, and uses of the software. The overview information also appears on this screen.
Sample Booklet: Pressing this button brings you to a sample booklet written by Fabiana Perla and Betsy O'Donnell using this software.
Helpful References: Pressing this button brings you to a list of references regarding techniques of orientation and mobility, assessment of these techniques, assessment of functional vision for orientation and mobility, and much more.
Cultural Sensitivity: Pressing this button brings you to material developed by Fabiana Perla and Betsy O'Donnell about understanding and responding appropriately to the culture/ethnicity of students and their families.
Recreational Programs: Pressing this button brings you to a list of names and contact information for organizations fostering a wide variety of athletic activities and physical recreation activities for persons with visual impairments.
Dog Guide Schools: Pressing this button brings you to a list of names and contact information for dog guide schools functioning in the United States at the time this software was published. The page also includes contact information for dog guide consumer organizations whose web pages offer more up-to-date school listings.
Print: prints the current screen including information about the software.
Student List: pressing this button takes you to the Student List screen, where you can add a new student for whose family you will create a booklet or select a student for whom you have already begun or completed a booklet. This navigation button is found at the bottom of the screen.
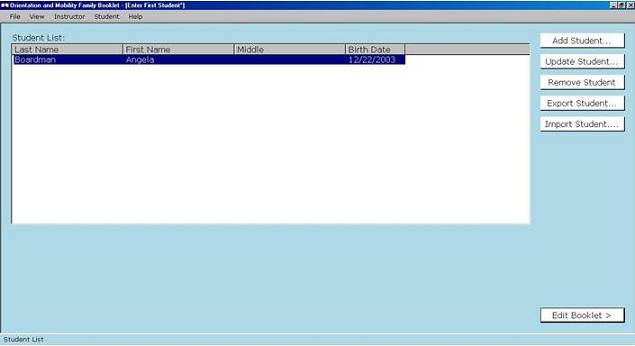 This screen shows the list of students for whom you have started or completed a booklet. Although other instructors may use this program, only your students will appear in this list. You can add or delete students from this list; and you can also create, update, or review a student's booklet.
When you use this program for the first time, there will be no student names in the list. The screen will include fields for student's last name, first name, middle initial, and birth date. As soon as you have listed your first student, the screen will display the student's name and birth date and will provide the following additional buttons:
Edit Booklet: pressing this button brings you to the Booklet Introduction screen, discussed later.
Add Student: pressing this button brings you to the screen requesting the new student's last name, first name, middle initial, and birth date.
Update Student: pressing this button allows you to update the student's name and birth date.
Remove Student: pressing this button allows you to remove this student and his/her associated booklet from the software. You are asked to confirm that you really want to remove the student and delete all data pertaining to his/her booklet from the program.
Export File, Create Student Data File to Share with Another Instructor: pressing this button allows you to create a file that another instructor can import into his/her program. A suggested file name composed of the student's first name, middle initial, and last name is offered. You can either list a path for the file or browse through folders on the computer to determine where to store this file. Let the instructor with whom you will share the file know where the file is stored on the computer so that he/she can locate and import it.
Import File, Load New Student Data File Shared by Another Instructor: pressing this button allows you to import a student data file saved for you by another instructor. You will need to enter the path and file name or browse through folders on the computer to locate the file. It is helpful if the instructor sharing the file with you lets you know where the file is stored.
If you have begun or completed a booklet for this student's family and you wish to continue working on the booklet or review it if it is completed, highlight the student's name in the Student List box and press the Edit Booklet button. Clicking Edit Booklet on the Student List screen takes you directly to the Booklet Introduction screen. You can move through a student's booklet using Back and Next buttons found in the lower right-hand corner of the screens or use items on the Student Menu.
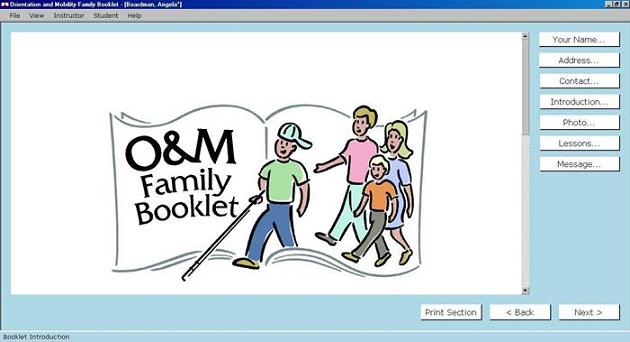 This screen can also be accessed with the Booklet Introduction item on the Student Menu.
The Introduction screen first displays the book's cover and front matter (authors, copyright, etc). Next, it offers text that introduces you to your student's family, gives contact information for you, and indicates the days and times of your student's O&M lessons. Finally, parents and others involved in your student's education are invited to let you know how to reach them by filling out the Family Contact Form at the end of the booklet. This section can also be viewed as an opportunity to invite others to participate in the O&M learning process.
You can edit all of your introductory information by using the edit buttons on the . The first three buttons, Your Name, Address, and Contact, give you a quick way to update your instructor information; changes you make to your instructor information are global. This means that these changes will appear in all booklets for all of your students. The next four buttons --Introduction, Photo, Lessons, and Message-- allow you to edit all the parts of the introduction text; changes that you make when using these buttons are only made to this specific page in this student's family booklet and are not global. The final three buttons, Next, Back, and Print Section are found on all booklet editing screens. Pressing Next brings you to the next screen, Back takes you to the previous screen, and Print Section prints the Introduction section of the booklet.
Now let's take a closer look at four buttons on the Introduction screen.
When you press the Introduction button, your cursor is placed inside a box in which you can edit your greeting to the family. Note that, when editing, the program will use token phrases for your first name, last name, and other items for which it will insert information. If you do not want the computer to insert this information, you can delete the token starting with the right bracket at the end and deleting backwards to the left bracket at the beginning. It is highly inadvisable to delete tokens. See Appendix A for a more thorough explanation of tokens.
The Edit Results box shows you the introduction information as you have edited it. If you are not satisfied with these results, you can move back to the Edit Introduction box and reedit the material.
Pressing the OK button saves your edits to the Introduction section and brings you back to the main Introduction screen. Pressing the Cancel button brings you back to this screen, but does not save the edits you have made.
Pressing this button offers you a list of three choices regarding your photo.
Do not Include Picture: if you select this radio button, no information about a picture of you will appear in the booklet.
Hard Copy Photo: if you select this radio button, an editable message box includes information telling parents that a photo of you has been pasted to the back of the front cover page of the booklet. The message explains that this photo will help parents recognize you if you need to meet.
Use Digital Photo: if you select this radio button, the software will include your digital photo, if you uploaded it on the Instructor Information screen. The Update Photo button allows you to upload a newer photo of yourself which will be used instead of the photo you originally uploaded in the Instructor Information screen. As always, you will need to provide a file pathname or browse to the photo file in order to update. Pressing the OK button on the Update screen brings you back to the Photo screen. On the Photo screen, the edit box contains a message telling parents that you are including a picture of yourself so that parents can recognize you more easily. If you have not uploaded a digital photo and you select this option, the message box will be blank.
Pressing the OK or Cancel buttons will bring you back to the main Introduction screen. The OK button will save your photo choices for this booklet. The Cancel button will not save the photo choices you have made.
Pressing the Lesson Schedule button brings you to an edit field labeled Lesson Days and Times. Here, you fill in the days and times of the student's O&M lessons. The software will insert the information you write after the stem, "Days and times of our lessons are. . .". Pressing OK saves your information and brings you back to the main Introduction screen. Pressing Cancel brings you back to this screen, but does not save your information.
Pressing the Message button brings up an edit field containing the message to parents, the last paragraph in the introduction text. You can edit this text, add to it, or delete it. Pressing the OK button saves your changes and returns you to the main Introduction screen; pressing the Cancel button brings you back to this screen, but discards your changes.
Pressing the Next button takes you to the About This Booklet screen.
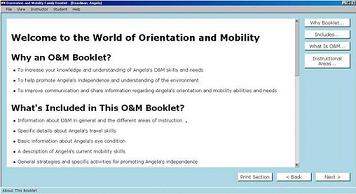 This screen can also be accessed with the About This Booklet item in the Student Menu.
This screen includes four buttons which take you to edit fields with information that you can edit if you wish. Information included in the booklet is listed on the screen; and each of the four buttons allows you to edit a particular section of this information. After you have confirmed your edits, material including your changes will be displayed on the screen.
When you are editing sections of this screen, token labels will appear for material that the software inserts from the instructor and student information. If you wish to change material inside the brackets of a token, delete the token from right to left, starting with the right bracket and ending with the left one. Then type the information that you want; what you type will take the place of information the program would have inserted. Appendix A provides a more thorough explanation of tokens. It is highly inadvisable to delete tokens.
As on all booklet editing screens, the Next and Back buttons will take you to the next and previous program screens respectively. The Print Section button prints the About This Booklet section of the booklet.
When the Why Booklet button is pressed, material is displayed that answers the question, "Why an O&M booklet" by giving the family three ways in which the booklet can be helpful to them and their child. You can add to, delete, or edit this material as you wish. Pressing the OK button saves your changes and brings you to the main About This Booklet screen. Pressing the Cancel button brings you to this screen without saving your changes. If you have pressed OK, your changes will appear in the text on the screen.
When the Includes button is pressed, a brief summary of what will be included in the booklet is provided. You can edit this information as you wish. If you omit any major section of the booklet, you MUST return to this item and remove the name of the section that you have omitted. Pressing the OK button saves your changes and brings you back to the About This Booklet screen; pressing Cancel brings you back to this screen without saving your edits.
Pressing the What Is O&M button brings up a definition of orientation and mobility in terms that a family can understand. You can edit this definition as you wish. Pressing the OK button saves your changes and brings you back to the main About This Booklet screen; pressing Cancel brings you back to this screen without saving your changes.
Pressing the Instructional Areas button brings up a list of the areas of O&M instruction and explains them in language that a family can understand. Again, you can edit this information as you wish. Pressing the OK button confirms your changes and brings you back to the main About This Booklet screen; pressing Cancel brings you back to this screen without saving your edits.
Pressing Next takes you to the Eye Conditions screen.
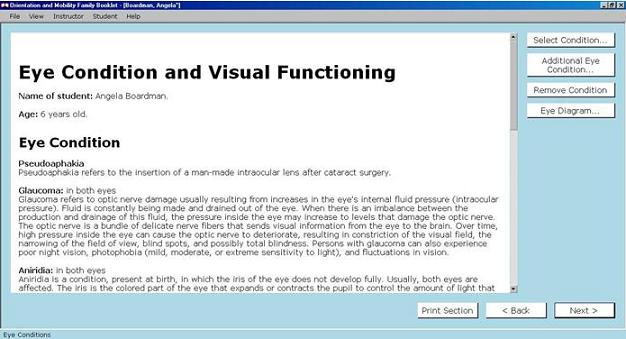 You can also go directly to this screen with the Eye Conditions item on the Student Menu.
This section of the booklet gives family members a brief summary of important information about their child's eye condition. When explaining eye conditions, it is important to use layman's terms, avoiding technical language unless clearly defined. For example, when using the word "photophobia," you may describe it as "sensitivity to light."
To complete this section of the booklet, you will need to gather information about your student's eye condition from school records. We offer several tools that will make reporting this information easier. Our picture of the eye with important parts labeled and described can help families better understand how vision works. We also provide a list of commonly occurring eye conditions and brief explanations. You can add your own conditions and definitions and use as much or as little of our material as you find appropriate for your student's particular family.
The content-related buttons on this screen include: Select Condition, Additional Condition, Remove Condition, and Eye Diagram. Finally, the Next and Back buttons move you to the next or previous screens; and the Print Section button prints the Eye Condition section of the booklet.
When pressed, the Select Condition button presents a list of eye conditions with their descriptions in a dropdown format. Scroll through the list of eye conditions until you locate your student's condition. Some eye conditions, by their nature, affect both eyes; and others can affect eyes individually. The software offers a choice of left, right, or both eyes for those eye conditions that do not automatically affect both eyes. It is important to click the box that indicates which eye is affected by the eye condition. Clicking OK saves this eye condition to the booklet and puts it in the booklet text on the screen. To select other conditions, click the Select Condition button again and repeat the selection process. There is no limit on the number of eye conditions that you can select. In many instances, you can start with the condition that causes the most functional impairment and proceed to the condition causing the least functional impairment. Conditions are included in the booklet in the order in which you select them.
The Additional Eye Condition button allows you to add a condition to your student's booklet that is not included in our list. Pressing this button causes two edit fields to be displayed: Type the name of the student's eye condition in the field labeled Enter Name of Condition; and type the description of the condition in the field labeled Condition Description. Because we cannot know whether the condition you add affects both eyes automatically or can affect either eye individually, we do not provide boxes for left eye, right eye, or both eyes. It is important to clarify this in your condition name or description. Pressing the OK button saves this condition and description to the family booklet, presents it on the screen, and takes you back to the main Eye condition screen; pressing Cancel takes you back to this screen without saving the condition you added.
Pressing the Remove Condition button brings you to a list of eye conditions you have selected or added. To remove a condition, select it and click OK. This removes the selected condition and brings you back to the main Eye Condition screen. Pressing Cancel brings you back to this screen, but cancels the process (i.e., you have not removed the condition).
Pressing the Eye Diagram button presents you with a check box labeled Include Eye Diagram and Description. If you check this box, you are presented with a second check box labeled, Use Color Diagram. If you check this box, the colored diagram will be included in the booklet; if you do not check it, the black-and-white diagram will be included. If you are printing the booklet on a color printer, use the color diagram. However, if you are printing on a black-and-white printer, do NOT use the color diagram because it will print in hard-to-distinguish shades of gray. As usual, the OK button accepts your choices regarding the eye diagram and returns you to the main Eye Condition screen. Pressing Cancel returns you to this screen without saving your eye diagram selections. By default, the eye diagram is not included in the booklet.
Pressing the Next button from the main Eye Condition screen brings you to the Visual Functioning screen.
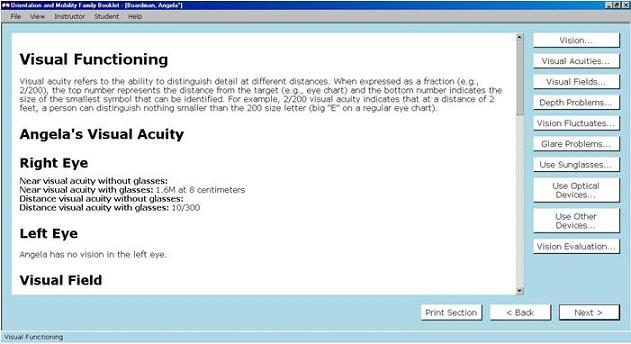 The Visual Functioning screen can also be accessed with the Visual Functioning item on the Student menu.
This section gives family members a brief summary of important information about their child's visual functioning. To fill out this section of the book, you will need to gather information about your student's present level of visual functioning. The school record includes a report from an eye care professional. The report resulting from a comprehensive clinical low vision examination conducted by a qualified optometrist or ophthalmologist typically answers questions related to visual acuities, visual fields, depth perception, vision fluctuations, glare, use of sun lenses, and optical devices. In addition to reviewing your student's eye reports, you may consider taking near and distance visual acuities with low vision charts (See Instructor Resources - Helpful References) if this has not already been done. The Helpful References List contains references on conducting comprehensive functional visual assessments; in combination with the clinical low vision examination report, assessment of functional vision pertaining to orientation and mobility tasks can provide very useful information.
You will be asked whether to recommend a low vision evaluation. Your recommendation will be based on whether one has already been done, and if so, when it took place. If you think your student's current level of visual functioning can be further enhanced, a low vision evaluation may prove helpful.
The number of buttons displayed on this screen depends on the student's amount of functional vision that you will indicate on the Vision screen. Initially, the Visual Functioning screen displays the Vision button. If the student has visual acuity in at least one eye, the following buttons will be displayed after you have entered information on the Vision screen: Visual Acuities, Visual Fields, Depth Problems, Vision Fluctuates, Glare Problems, Use Sunglasses, Optical Devices, Other Devices, and Vision Evaluation. The Next button takes you to the next screen, the Back button takes you to the previous screen, and the Print Section button prints the Visual Functioning section of the booklet.
When pressed, the Vision button takes you to a series of choices about level of vision in the student's right and left eyes. Choices are made separately for the left and right eyes and include:
No Vision
Light Perception: the ability to see light, but not its direction
Light Projection: the ability to see the presence and direction of light
Visual Acuity: measurable visual acuity
Information that you record on this screen determines which of the subsequent visual functioning buttons will be presented to you. The acuity, visual fields, and depth perception buttons will appear only if you mark the Visual Acuity item for one or both of your student's eyes; if only one eye has measurable acuity, the acuity button will include questions only about the eye for which you have specified acuity. Similarly, the Optical Devices button will only be presented if your student has visual acuity in one or both eyes.
If you indicated on the Vision screen that your student had visual acuity in one or both eyes, the Visual Acuities button is available. When pressed, an explanation of the meaning of visual acuity is provided for the family. In addition, you record visual acuities for each eye separately for near and distance vision with and without corrective lenses. If you marked an option other than visual acuity for one of your student's eyes on the Vision screen, acuity entries for that eye will not appear on the Visual Acuity screen.
Acuity is entered as follows:
Right eye
Near visual acuity without glasses
Near visual acuity with glasses
Distance visual acuity without glasses
Distance visual acuity with glasses
Left eye
Near visual acuity without glasses
Near visual acuity with glasses
Distance visual acuity without glasses
Distance visual acuity with glasses
The software provides a field in which you can enter general comments about the student's visual acuity. Clicking OK saves your acuity material to the family booklet and returns you to the main Visual Functioning screen; clicking Cancel returns you to this screen without saving this material.
If you indicated on the Vision screen that your student had visual acuity in one or both eyes, the Visual Fields button is available. The software includes an explanation of the meaning of visual fields. It also provides an entry field in which you can include visual field information about your student, explain the impact of field limitations on your student's orientation and mobility, and suggest ways in which the family can help the student handle these issues. In the instance when a student presents unimpaired visual fields, your explanatory comment is also helpful to the family. Clicking OK saves your changes and brings you back to the main Visual Functioning screen; clicking Cancel brings you back to this screen without saving your changes.
If you marked the Acuity option on the Vision screen for one or both of your student's eyes, the Depth Problems button will be available on the main Visual Functioning screen. By default, the Depth Problems radio button is not checked. If you do not change this setting, the software will not include the Depth Problems heading. If you press the button labeled Problems with Depth Perception, a comments field allows you to explain the specific problems that the student experiences with depth perception, the impact of these problems on the student's travel, and ways that the family can help the student handle these issues. If visual acuity was not selected for at least one eye on the Vision screen, the Depth Problems button will not be available because depth perception is not possible without visual acuity.
Clicking OK saves your information about depth perception to the booklet and brings you back to the main Visual Functioning screen; clicking Cancel brings you back to this screen without saving your information.
The Vision Fluctuates button is available if you indicated that your student has light perception, light projection, or visual acuity in one or both eyes on the Vision screen. By default, the No Vision Fluctuations button is checked. When the No Vision Fluctuations button is checked, the software does not enter a heading or other information about vision fluctuation in the booklet. If you check the Vision Fluctuations button, the software provides an edit field in which you can describe the student's shifts in vision, the specific impact these have on the student and his/her travel, and ways that the family can help the student handle these issues.
Clicking OK saves your information about vision fluctuations to the family booklet and brings you back to the main Visual Functioning screen; clicking Cancel brings you back to this screen without saving your information to the booklet.
The Glare button appears if you indicated that your student has light perception, light projection, or visual acuity in one or both eyes. By default, No Glare Problems is checked; if you do not change this setting, the Glare Problems heading will not be included in the family booklet. If you check the Glare Problems radio button, the software provides an edit field in which you can describe the student's experience of and problems with glare and note how the family can help the student manage glare.
Clicking OK saves your information about glare to the family booklet and brings you back to the main Visual Functioning screen; clicking Cancel brings you back to this screen without saving your information to the booklet.
If you indicated that your student has light perception, light projection, or visual acuity in one or both eyes, the Sunglasses button is available on the main Visual Functioning screen. By default, the Sunglasses radio button is not checked. If you do not change this setting, the software will not include the Sunglasses heading and will not include information about sunglasses. If you press the radio button labeled Needs Sunglasses, the software provides an edit field in which you can describe the type of lens, the problems with glare or bright light that make the lenses necessary, and actions that the family can take to help the student follow through on wearing sunglasses.
Clicking OK saves your information about sunglasses to the family booklet and brings you back to the main Visual Functioning screen; clicking Cancel brings you back to this screen without saving your information to the booklet.
If you indicated that your student has visual acuity in one or both eyes, the Uses Optical Devices button is available. If you do not press this button, the heading about optical devices and other information about them will not appear in the family booklet. If you press the button, the screen displays introductory information about optical devices that will appear in the booklet. The screen also includes buttons labeled Telescopes, Magnifiers, and Video Magnifiers. Press buttons that correspond to the types of optical devices that your student has. When you have completed this process, press the OK button to save your material to the family booklet; you will then be automatically returned to the Visual Functioning screen. Pressing the Cancel button returns you to this screen without saving optical device material to the booklet. Now let's take a closer look at the buttons on the Optical Devices screen.
Press the Telescopes button if your student uses a telescope. When you press this button, the screen displays boxes with editable information labeled Overview and Care Of. The Overview box includes an explanation of the nature of telescopes; and the Care Of box includes general instructions for protecting and cleaning telescopes. You can edit information in these boxes as you wish. The edit field labeled Your child uses allows you to enter the name, power, and other information about the specific telescope or telescopes that the student uses.
Clicking OK saves your information about telescopes to the family booklet and brings you back to the Optical Devices screen; clicking Cancel brings you back to this screen without saving your information to the booklet.
Press the Magnifiers button if your student uses a magnifier. When you press this button, the screen displays two boxes with editable information labeled Overview and Care Of. The Overview box provides general information about magnifiers; and the Care Of box provides general instructions for protecting and cleaning magnifiers. You can edit information in these boxes as you wish. The edit field labeled Your child uses allows you to enter the name, power, and other information about the specific magnifier or magnifiers that the student uses.
Clicking OK saves your information about magnifiers to the family booklet and brings you back to the Optical Devices screen; clicking Cancel brings you back to this screen without saving your information to the booklet.
Press the Video Magnifiers button if your student uses a video magnifier. Note that video magnifiers include CCTVs and any other devices that take a picture and magnify it on a screen. Some video magnifiers consist of a hand-held camera that sends magnified images to a TV screen; some portable devices with their own screens can be carried in a backpack or brief case; other hand-held devices are small enough to fit in a pocket; and still others may be worn.
When you press the Video Magnifiers button, the screen displays two boxes with editable information labeled Overview and Care Of. The Overview box provides general information about video magnifiers; and the Care Of box provides general instructions for protecting and caring for video magnifiers. You can edit information in these boxes as you wish. The edit field labeled Your child uses allows you to enter the name and description of the specific video magnifier(s) that the student uses.
Clicking OK saves your information about video magnifiers to the family booklet and brings you back to the Optical Devices screen; clicking Cancel brings you back to this screen without saving your information to the booklet.
Remember that you must click the OK button on the Optical Devices screen in order to save optical device information to the family booklet and return to the Visual Functioning screen. Clicking Cancel on the Optical Devices screen returns you to the Visual Functioning screen without saving any of your optical device information.
The Other Devices button is available for all students regardless of level of vision. Information about other devices is not included in the booklet unless you press this button and provide information in the fields that follow.
Other Devices refers to cutting edge electronic devices that enhance vision. Examples of such devices might include systems that transmit material from a video camera to the brain where it is processed as visual information or miniaturized artificial photoreceptors that are implanted directly into the retina to replace destroyed retinal photoreceptors. The field of artificial vision is expanding rapidly; although current students may not have access to such devices, it is likely that an increasing number of such devices will become available in the future.
If your student uses any developing artificial vision devices, press the Other Devices button. Type the device's name in the field labeled Specify Device; and provide explanatory information in the Comments box.
Pressing the OK button saves information about other devices to the family booklet and brings you back to the Visual Functioning screen. Pressing the Cancel button brings you back to this screen without saving material about other devices to the booklet.
If you have indicated that your student has light projection or visual acuity in one or both eyes, the Vision Evaluation button is available. Pressing this button brings you to two radio buttons labeled Do Not Recommend Low Vision Evaluation and Recommend Low Vision Evaluation. By default, the Do Not Recommend Low Vision Evaluation button is checked. If you do not check Recommend Low Vision Evaluation, the booklet will not contain a heading or other information about a low vision evaluation. If you select the Recommend Low Vision Evaluation button, you should enter an explanation of your recommendation in the Comments edit field that follows. If the student has never had a clinical low vision examination, you may wish to give more detailed information about the nature of this exam, its benefits to the student, the type of professional (low vision optometrist or ophthalmologist) who can perform it, and perhaps potential sources of funding assistance.
Clicking OK saves your low vision evaluation recommendation to the family booklet and brings you back to the Visual Functioning screen. Clicking Cancel brings you back to this screen without saving your information to the family booklet.
Clicking Next brings you to the Additional Impairments screen.
 This screen can also be accessed from the Additional Impairments item on the Student Menu.
The Additional Impairments screen offers you the opportunity to describe any additional impairments that impact the student's ability to process information about orientation and mobility or to perform orientation and mobility skills. This section is not included in the booklet if you do not enter information on this screen about additional impairments. The following two edit fields appear on the screen:
Additional impairments: any impairments in addition to visual impairments that would impact the student's orientation and mobility activities
Impact on O&M: impact of additional impairments on the student's orientation and mobility, with emphasis on strategies that can help the student reduce the functional limitations of these impairments
Clicking Next brings you to the Specific Goals screen.
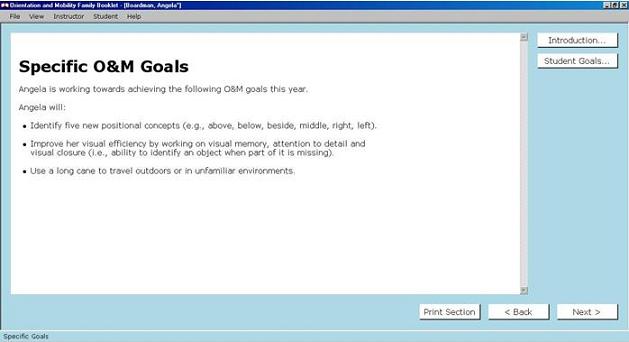 This screen can also be accessed from the Specific Goals item on the Student Menu.
This screen includes introductory text, an introduction button, and a Goals button. Pressing the Introduction button brings you to editable text indicating that the student's O&M goals for the current year will follow. You can edit this text after you press the Introduction button. To save your changes to the family booklet and return to the Specific Goals screen, press OK; press Cancel to return to this screen without saving your changes. The Goals button brings you to an edit box in which you can list the student's O&M goals. Provide any additional information about these goals that you would like to share with the student's family. Press OK to save these goals to the booklet and return to the Specific Goals screen; press Cancel to return to this screen without saving this material. Pressing Next brings you directly to the Understanding O&M Skills, Concept Areas screen.
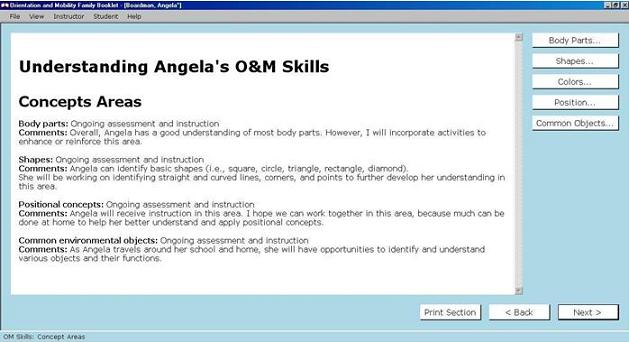 This screen can also be accessed with the O&M Skills: Concept Areas item on the Student Menu.
This screen includes the following five buttons, one button for each concept being rated. Buttons are labeled with shortened forms of the concept name as follows:
Body for Body Parts
Shapes for Common Shapes
Colors for Color Concepts
Position for Positional Concepts
Objects for Common Environmental Objects
To rate your student's degree of understanding of each concept area, press its button and then check one of the following four response buttons:
Not applicable to this student
Not addressed yet
Ongoing instruction and assessment
Has good understanding
A comment box is available regardless of which alternative you check. Here you can record your comments about the rating that you gave. Clicking OK saves your rating to the family booklet and returns you to the Understanding O&M Skills, Concept Areas screen. Pressing Cancel returns you to this screen without saving your rating.
Clicking Next takes you to the Understanding O&M Skills, Instructional Areas screen.
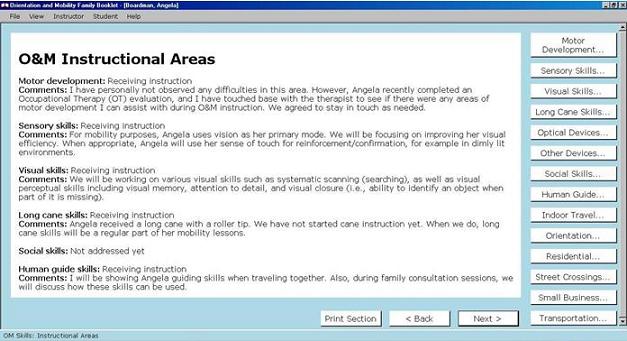 This screen can also be accessed with the O&M Skills: Instructional Areas item on the Student Menu.
This screen includes fourteen buttons, one button for each instructional area being rated. Depending on the screen resolution that you have set, all of these buttons may not appear on the screen. If some of these buttons are not visible, a scroll bar appears on the right side of the screen so that you can scroll to the remaining buttons. The following buttons, some labeled with shortened forms of the instructional area name, are available:
Motor Development
Sensory Skills
Visual Skills
Long Cane Skills
Optical Devices for Optical Devices Skills
Other Devices for Other Devices Skills
Social Skills
Human Guide for Human Guide Skills
Indoor Travel for Indoor Travel Skills
Orientation for Orientation Skills
Residential for Residential Travel Skills
Crossings for Street Crossing Skills
Business for Small Business Travel Skills
Transportation for Public Transportation Skills
To rate your student's degree of mastery in each instructional area, press its button and then check one of the following four response buttons:
Not applicable to this student
Not addressed yet
Receiving instruction
Demonstrates proficiency
Regardless of which alternative you check, a Comments box allows you to record your own comments about your rating. Clicking OK saves your rating to the family booklet and returns you to the Understanding O&M Skills, Instructional Areas screen. Pressing Cancel returns you to this screen without saving your rating.
Clicking the Next button takes you to the General Strategies for Promoting Independence screen.
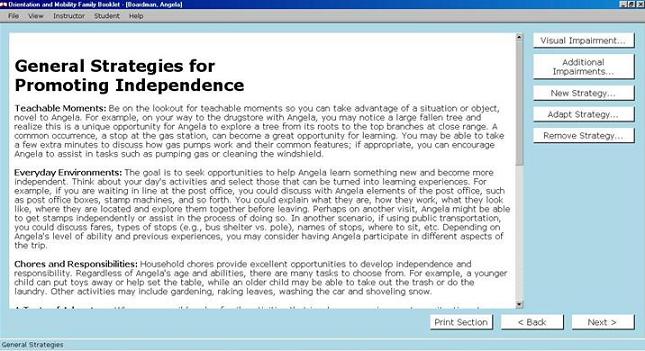 This screen can also be accessed with the General Strategies item on the Student Menu.
This screen allows you to select, modify, and/or create guidelines and suggestions that, when followed in a family's day-to-day routines, will help the student build a sense of self-efficacy, responsibility, self-confidence, and independence. Authors have developed one list of strategies that fit well for students with visual impairments and a second list that highlights adaptations for students with multiple impairments. Appendix B includes the list of strategies for students with visual impairments, and Appendix C includes the list of strategies that highlight adaptations needed by some students with multiple impairments.
In both lists, strategies are written in very general terms that could apply to students with a wide variety of functional impairments. In fact, both lists are very similar in content. The strategies support families in helping all children with visual impairments reach their potential in terms of independence and self-direction. Always look at both lists when creating booklets for families of students with multiple impairments. Frequently, items from the Visual Impairment list will fit better for a given student than will items from the Multiple Impairments list. On the Multiple Impairments list, you will find strategies that take into account the possibility that your student may need to work more slowly or differently toward a goal or may need to receive more family support in achieving that goal. However, many students with multiple impairments can benefit from the level of challenge characterizing items on the Visual Impairments list.
The General Strategies screen includes buttons with the following labels:
Visual Impairments
Additional Impairments
New Strategy
Adapt Strategy
Remove Strategy
Pressing either of these buttons brings up a list of strategies from which you can select. Highlight a strategy, click OK, and the strategy will be included in the booklet and shown in the on-screen booklet material. The screen includes a note reminding you to check both lists of strategies for students with multiple impairments because you will probably find valuable strategies in both lists. A number of strategies are repeated in both lists; and adaptations to these strategies offered in the Additional Impairments list may be more appropriate for some students with multiple impairments. On the other hand, some strategies in the Visual Impairments list offer a higher level of challenge appropriate for some students with multiple impairments.
To select another strategy, click the Visual Impairments or the Additional Impairments button again; highlight the strategy; and click OK. Continue this process until you have included all the strategies that you want in the booklet. Clicking Cancel brings you back to the General Strategies for Promoting Independence screen without accepting the strategy you selected.
The New Strategy button allows you to create and add a new strategy to the family booklet. When you press this button, two empty edit boxes appear on the screen: one for the strategy title and the other for the strategy text. Simply type your title and text in the appropriate places. The two Add checkboxes allow you to save this strategy only to this family's booklet (when the boxes are unchecked) or globally to either of the lists of strategies that appear for all booklets that you create (when one or both boxes are checked). The Add boxes are unchecked by default, indicating that you will use your strategy only in this booklet and that you will not add this strategy to the strategy lists. If you check the box labeled Add to Visual Impairment Pool, the new strategy that you created will always appear in the Visual Impairments list whenever you view the list in the future. Similarly, if you check the box labeled Add to Additional Impairments Pool, the new strategy will always appear on this list when you view this list in the future.
Press the OK button to add your new strategy to this family's booklet and to your software's strategy lists (depending on whether you have checked the Add boxes). You will then be returned to the General Strategies for Promoting Independence screen. Pressing Cancel will return you to this screen without saving your new strategy. Pressing the Next button will bring you to the Specific Activities for Promoting Independence screen.
Pressing the Adapt Strategies button brings you to a list of strategies that you have included in the booklet. After highlighting a strategy, press OK. The software then presents an edit box with the strategy title; here, you can change this title as you wish. The next edit box includes the strategy text. You can change wording, edit or delete sentences, and make any other changes that you wish. The Add to Visual Impairment Pool checkbox allows you to save this adapted strategy globally in the Visual Impairments strategy list as a replacement for the strategy provided by the software. Similarly, the Add to Additional Impairments Pool checkbox allows you to save this adapted strategy globally in the Additional Impairments strategy list as a replacement for the strategy provided by the software. By default, the checkboxes are not checked; and the strategy will only be used in this family's booklet. Unless you are very certain that you never want to use the unadapted strategy again, you should avoid checking the Add boxes. Once a box is checked and the OK button pressed, you will not be able to access the software's original version of the strategy in the list involved. It should be noted that this change effects only your use of the software; all other instructors logging into this software on this computer will be able to access the original strategy unless they have changed it in the manner just described.
Press the OK button to make your changes to the strategy final in this family's booklet and in your software's strategy lists (depending on whether you have checked the Add boxes). You will then be returned to the General Strategies for Promoting Independence screen. Pressing the Cancel button returns you to this screen without saving your changes to the booklet or software lists.
When you press the Remove Strategy button, the list of strategies that you have selected appears. Select the strategy that you wish to remove, press OK, and the strategy will be removed from the booklet and from the on-screen booklet text. Pressing Cancel brings you back to the General Strategies for Promoting Independence screen without removing the strategy you selected. To remove another strategy, click the Remove Strategy button again and repeat the removal procedure.
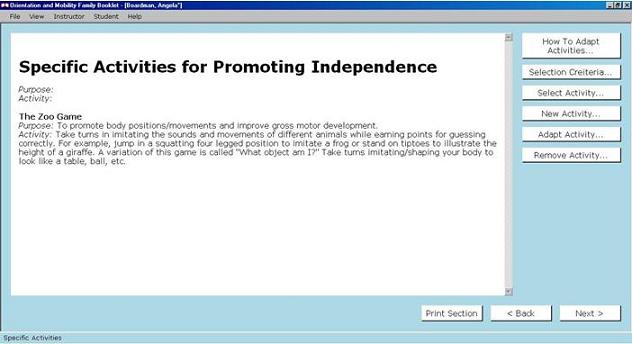 This screen can also be accessed with the Specific Activities item in the Student Menu.
The purpose of the Specific Activities for Promoting Independence section is to assist families in promoting their children's independence and incorporating O&M activities into everyday life. The goal is to assist families in reinforcing specific mobility skills, enhancing concept development, and exploring a variety of environments meaningful to the child. In this section you will select, modify, and/or create activities, keeping in mind your student's strengths and needs. You may find additional ideas for activities in the Helpful References document accessed from the Instructor Resources item on the Help Menu. The software provides sample activities that can be selected or adapted to fit the child's needs, age, or performance level.
Activities include games and things the child and family can do while at home or on shopping trips or other outings. They help the child apply O&M skills to real-life situations that also can be fun. Appendix D includes the list of all such activities in the software.
The Specific Activities for Promoting Independence screen includes six buttons as follows:
How to Adapt Activities: when pressed, suggestions for adapting activities to meet the needs of students with additional impairments are displayed. Keep these suggestions in mind when you are adapting or creating activities to meet the specific needs of your student. Information displayed with the How to Adapt Activities button is included in the next section of this manual.
Selection Criteria: When pressed, three sets of criteria for selecting activities are displayed. Activities can be selected according to whether they do or do not require use of functional vision; can be done at home or in the community; and are appropriate for various grade and developmental levels. You can select multiple options in these criteria. The more options you select, the more activities will be displayed from which you can choose.
Select Activity: When pressed, a list of activities that fit your criteria selections is displayed. Select an activity, click OK, and the activity is included in the booklet and on screen. Clicking Cancel returns you to the Specific Activities screen without selecting the activity. Press the Select Activity button again to select another activity.
New Activity: After you have selected your first activity, the New Activity button appears. When pressed, three edit fields are presented in which you can write your own activity. These fields are labeled Activity Name, Purpose, and Activity. Check the Add to Activity Pool box if you want your new activity to be included in the general list of activities that appear when you create other booklets. If you want to use this activity for this student only, do not check the Add Activity box. Pressing OK saves your new activity and inserts it into the family booklet and the on-screen booklet material. Pressing Cancel returns you to the Specific Activities for Promoting Independence screen without saving your activity.
Adapt Activity: After you have selected your first activity, the Adapt Activity button appears. When pressed, three edit fields are presented in which you can edit material included in the original activity: Activity Name, Purpose, and Activity. Check the Add Activity to Pool box if you want your adapted activity to be included in the general list of activities that appears when you create other booklets. If you want to use this activity for this student only, do not check the Add Activity box. Pressing OK saves your adapted activity and inserts it into the family booklet and the on-screen booklet material. Pressing Cancel returns you to the Specific Activities screen without saving your adaptations.
Remove Activity: After you have selected your first activity, the Remove Activity button appears. When pressed, the list of activities that you have selected, adapted, and created is presented. Select the activity you wish to remove, click OK, and the activity is removed from the family booklet. Pressing Cancel returns you to the Specific Activities for Promoting Independence screen without removing the activity that you selected.
While the Specific Activities suggested in the software may apply to most of your students, some may need to be adapted to better address the needs and abilities of a specific child and to ensure they are in accordance with his/her cognitive level of functioning and prior experience. If activities need to be modified, keep in mind that both the general strategies and the specific activities can be edited using this software. That way, you can select aspects of a given activity while altering or adding others to better meet the needs of the children and families with whom you work. The examples provided below illustrate ways some of the activities can be tailored for a particular student.
Juan is a 5 year old boy who is in a special education kindergarten class. Two years ago he was in a serious car accident which resulted in a cognitive impairment including attention and short-term memory as well as a vision field loss. His interest in cameras and photographs was used by his O&M instructor to adapt the activity "Kids Teach." After certain mobility lessons, a photograph was sent home to be used as a prompt to assist in discussing what took place during the lesson.
Ann is a 10 year old girl who attends public school in an urban environment. She has moderate low vision and a severe hearing loss. She is proficient at sign language, friendly and outgoing. Ann's O&M instructor provided training in public transportation using communication cards. When preparing her booklet, he adapted the activity "All Aboard" to include the use of communication cards so that Ann's parents could reinforce these newly learned skills. Likewise, the O&M instructor suggested the use of communication cards for the activities "Lining Up" and "Pocket Money."
Josh is a 16 year old who has cerebral palsy. He uses a motorized wheelchair that he can operate with his left hand. He has moderate low vision and significant developmental delays. He loves traveling outside but has few opportunities to do so. Josh's O&M instructor selected the activity "Exploring the Neighborhood" for the booklet, but adapted it for his family. His parents would go on walks with Josh and point out different surfaces along the way such as brick, cement or gravel and what they might indicate (e.g., crossing a driveway, approaching the corner). The parents were also encouraged to discuss and provide opportunities for Josh to experience slopes such as ramps at street corners and driveway aprons.
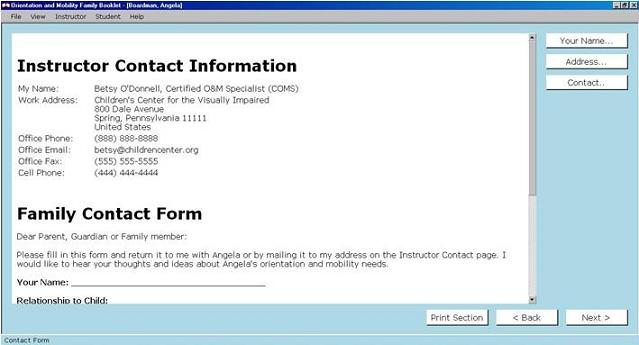 The Family Contact Form screen includes your contact information to help the family get in touch with you and a form for the family to complete to help you get in touch with appropriate family members.
The Instructor Contact Form is simply a one-page summary of your name, credentials, phone and fax numbers, work address, and e-mail address. This form also has the three buttons that allow you to change your name, work address, and contact information. Although your contact information has already been provided in the booklet introduction and on the title page, it is reprinted on one page to make it easier for your students' families to get in touch with you.
The Family Contact Form appears at the end of the booklet. This form will be completed by the student's parent(s), guardian(s), or other family member(s); the form should be returned to you either by the student or in the mail. You can print a second form if both parents want to take an active role in the child's orientation and mobility, but no longer have the same contact information.
Include the Family Contact Form as a loose sheet in the booklet instead of binding it with the remaining pages. Putting the form in an envelope with your name and address on the front may make it easier for the family to return it to you. Obtaining the completed form from your student's family should make communication easier to manage.
The Print button on this screen prints the Family Contact Form; you may find it helpful to send Family Contact Forms home with all of your students, regardless of whether you are preparing a booklet for their families.
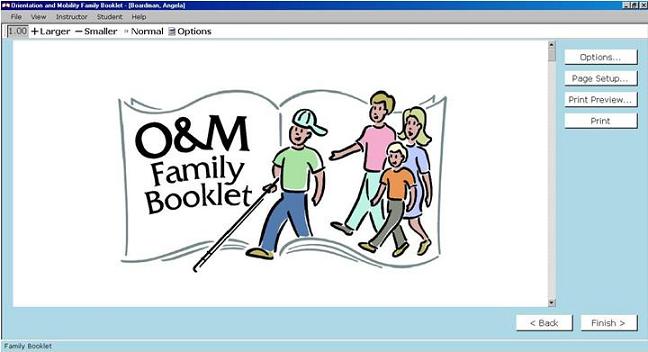 The Family Booklet screen presents the completed booklet. You can use the Back button to return to any sections that you wish to edit. However, because you have viewed sections of the booklet as you created them, it is likely that the booklet that you see on the screen will require little, if any, editing.
This screen includes six buttons. The Back button takes you back to prior screens to make changes; and the Finish button keeps the family booklet as you see it on the screen and returns you to the Student List screen. The Options, Page Setup, Print Preview, and Print buttons are discussed below.
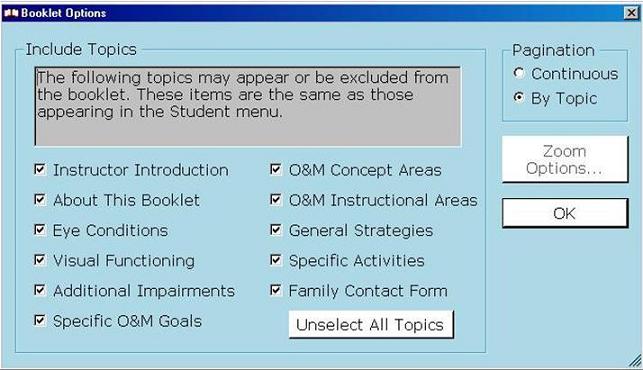 First, pressing the Options button brings up a series of check boxes, one for each topic in the booklet. By default, all major topics of the booklet will be included in the book - that is, their checkboxes are checked. You can make your final decisions about sections to omit by un-checking the appropriate boxes. If you have unchecked a number of boxes and wish to include all sections, you can either recheck boxes individually or press the button labeled Select All. You can also initially unselect all and then select the sections that you want to print.
Second, you can choose whether you want the book to be formatted with page breaks between sections (the option that is set initially) or continuously (with no page breaks between sections). The button for pagination by section is selected initially because this makes the booklet easier to understand and more attractive. However, if you select continuous pagination, it will remain selected for future runs of the program until you change the selection. If you used continuous pagination the last time you used the program, you will need to change the selection if you now want to print a booklet in which each section begins on a new page.
Third, clicking the Zoom Options button allows you to show or not show the zoom toolbar (shown by default); to select large icons (not checked by default); to choose the style for the toolbar (text and icons are checked by default); and to choose the zoom level for the Family Booklet screen. With the Zoom Toolbar checked, you can zoom in or out and thereby view the booklet on the screen in larger or smaller font sizes. However, the critical fact about the zoom setting is that the print size you choose on the Family Booklet screen with the zoom feature determines the size of the print in the family booklet printout. The zoom feature causes both text and pictures to increase or decrease in size proportionally. Therefore, if you are printing a booklet for a family in which some members have low vision, you can produce a large print booklet by increasing the zoom level. By default, the booklet is printed in 12 point Arial font.
The Page Setup button allows you to change paper size, paper source, page headers and footers, whether the page is printed in portrait or landscape mode, and page margins. You can change the margins here; however, we recommend that you do not change any of the other settings. we only support printing with the default selections for paper size, orientation, and headers and footers.
There is a relationship between the version of Internet Explorer installed on your computer and the O&M Family Booklet software. You do NOT need to do anything with Internet Explorer to run and use this program. However, if you have Internet Explorer 8 or later installed on your computer, you may find a Font Size Dialog in the Page Setup item on the last screen of the program. If you have a Font Size Dialog under the Page Setup dialog, do NOT use it to change the font size in the booklet. Although this dialog may result in font size changes, diagrams may not be changed in size; and other format features may not display appropriately. ALWAYS change font size by using the Zoom Option available from the Options item on the Family Booklet screen.
The Print Preview button shows you how the booklet will look when it is printed. The Print Preview dialog allows you to change any of the options available to you in the Page Setup dialog, and shows you a view of how the document will look after making such setup changes. As noted above, formatting will be accurate when default settings are used.
The Print button on the Family Booklet screen prints the booklet exactly as it is shown on the screen. As previously discussed, you can omit sections of the booklet using the Options dialog; when you do this, omitted sections are no longer on the booklet screen. Use the following guidelines for determining how to print and how NOT to print the booklet.
Use the Print Section button on all booklet editing screens to print the specific section of the booklet; when printing one section at a time in this way, pages will not be numbered
Use the Print button on the Family Booklet screen (where the entire booklet is displayed) to print the complete booklet as you see it on the screen; pages will be numbered when printing in this way
If you want to omit one or more sections from the printed booklet, press the Options button. Uncheck the boxes for the sections you want to omit, click OK, and you will see that these sections have been omitted from the on-screen booklet. Pages will be numbered consecutively when you omit sections in this way. If you have left sections blank, you must use the Options dialog to unselect them so that they will not print in the booklet. The only exception to this rule is the Multiple Disabilities screen, which will not appear on the final screen and will not be printed if you have not entered information into the boxes on this screen.
When an entire book is printed using the pagination by topic option, there is a remote possibility that a blank page will appear in the booklet. To correct this problem, you can change the margins you have used by pressing the Page Setup button or you can elect to print the book with continuous pagination. When printing with continuous pagination, new booklet sections do not begin on new pages, but are printed immediately below the end of the previous section. To change from pagination by topic to continuous pagination, select the radio button for continuous pagination found when you press the Options button on the booklet screen.
We have discussed all items on the Instructor Menu and Student menu previously. Now we will consider the remaining three menus: File, View, and Help.
All menus can be opened in the usual way and can also be opened with specific hot keys. When pulling down a menu using the keyboard, press the alt key in combination with the first letter of the menu's name.
Items on the File Menu include:

Save: saves booklet data to the hard drive of your computer. When you create or edit a booklet, the software automatically saves the booklet when you close the program, no matter where you are in the booklet creation process.
Save As File: allows you to save an electronic copy of a booklet as an HTML document.
Exit: closes the program.
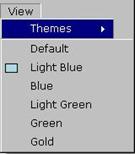 The View Menu includes one item, Themes. The Themes item provides a choice of screen background colors. The default background color is white. It may be helpful for instructors with low vision or other conditions that affect their ability to view material on a computer screen to try other background colors. A change of color and contrast may have a striking impact on the ability to read the screen comfortably.
Items on the Help Menu include:
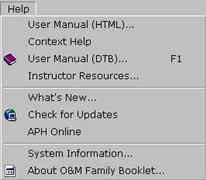
User Manual, HTML: opens this User Manual in HTML format, allowing for quick navigation to desired sections.
Context Help: when in a specific section of the software, clicking on this button will take you to the section of this manual pertaining to that section.
User Manual DTB: opens this User Manual in Daisy book format, allowing for quick navigation to desired sections.
Instructor Resources: takes you to the Instructor Resources screen from which you can select the software Overview; the Student List; the Sample Booklet; Helpful References; and documents on Cultural Sensitivity, Recreational Programs, and Dog Guide Schools. These items can be printed or read on the computer screen.
What's New: this item opens a web page that documents the program version and changes and improvements that have been made with each revision.
Check for Updates: this item displays a message that will let you know whether there is an update available for the program. In order for this feature to function, your computer must be connected to the internet so that the APH software download site can be queried by the software. If the dialog indicates that there is a program update, close all open programs, and click OK. A dialog box will open asking if you want to update now. Click "OK." The screen will display information about the update process and will indicate when the update is complete. Although some major software updates may require payment, it is anticipated that smaller updates will be free of charge. If an update requires payment, the Update item will provide information about payment procedures.
APH Online: this item takes you to APH's Demonstration Software and Product Information web page. Again, your computer must be connected to the internet to use this option.
System Information: this item provides specific information about your system to assist technical support.
About O&M Family Booklet: this item shows which version of the program you have installed on your computer. Additional details include demo status, 64-bit operation, and a brief description.
This software has been designed to be accessible to persons using screen reader or screen magnification programs. Persons with visual impairments using such technology should be able to use this software. Booklets can also be provided in large print, braille, or electronic formats. To produce a booklet in large print, press the Options button on the final screen of the program and then use the Zoom feature previously discussed. To produce an html copy of a booklet that can be read using a computer with a screen reader and a web browser, use the Save As option on the File Menu. To emboss a copy of the book in braille, use the Save As item on the File Menu and then process the resulting html file with braille translation software.
The four resource documents that follow provide information that will help you prepare an O&M family booklet. Much of this information applies to most - if not all - topics of the family booklet. These resources can be accessed easily from any point in the software by using the Instructor Resources item on the Help Menu. These resources include:
Useful References: authors list articles and books that offer excellent information about the techniques of O&M and about assessment of a student's level of understanding and performance of O&M concepts and skills respectively.
Cultural Sensitivity: highlights the importance of understanding the culture/ethnicity of the student's family as well as the danger of making specific assumptions about the family's values, beliefs, and attitudes based solely on their culture/ethnicity. Practical strategies to help the O&M instructor maintain an atmosphere of respect and listen to concerns of families with cultures/ethnicities other than his or her own are discussed.
Recreational Programs: contains names and contact information for a variety of organizations/facilities that deal with sports/recreation for persons with visual impairments. This list is not comprehensive, but will provide a way for you or your student interested in athletics to begin a search.
Dog Guide Schools in the United States: provides contact information for 14 dog guide schools in the United States. Although this information changes as some of the smaller schools disappear and new ones arise, it provides a starting point for research for families with children interested in working with a dog guide.
Anthony, T. L. (2000). Performing a functional low vision assessment. In F. M. D'Andrea and C. Farrenkopf (Eds.), Looking to learn: Promoting literacy for students with low vision (pp. 32-83). NY: AFB Press.
Smith, A. J., & Geruschat, D. R. (1997). In B. B. Blasch, W. R. Weiner, & R. L. Welsh, (Eds.). Foundations of Orientation and Mobility (2nd Ed.). New York: AFB Press.
Smith, A. J., & Geruschat, D. R. (1996). Orientation and mobility for children and adults with low vision. In A. L. Corn & A. J. Koenig (Eds.), Foundations of low vision: Clinical and functional perspectives (pp. 306 - 321). NY: AFB Press.
Smith, A. J., & O'Donnell, B. (1992). Beyond arm's reach: Enhancing distance vision. Philadelphia: Pennsylvania College of Optometry Press.
South Carolina Department of Education. (1992). The South Carolina functional vision assessment. Columbia, SC, South Carolina Department of Education.
Feinbloom Low Vision Charts: Designs for Vision: 760 Koehler Avenue Ronkonkoma, NY 11779 516-585-3404 800-345-4005 Fax 516-585-3404
LH Symbol Test [for children] & Lighthouse "Continuous Text" Card for Adults [for near vision]: Lighthouse Low Vision Products, 36-02 Northern Blvd Long Island City, NY 11101 800-453-4923 Fax 718-786-0437
SOSH Low Vision Chart [for distance]: designed by The Student Optometric Service to Humanity (3rd ed.), 1990. To order contact PA College of Optometry bookstore, 8360 Old York Rd., Elkins Park, PA 19027.
Cratty, B. J., Sams, T. A. (1968). The body-image of blind children. New York: AFB Press.
Dodson-Burk, B., Hill, E. W. (1989). Preschool Orientation and Mobility screening. Publication of Division IX of the Association for Education and Rehabilitation of the Blind and Visually Impaired (AER).
Hill, E. W. (1981). The Hill performance test of selected positional concepts. Stoelting Company, 1350 S. Kostner Avenue, Chicago, IL 60623 312-522-4500, Instructional Manual, Cat. No. 33955M.
Pogrund, R., Healy, G., Jones, K., Levack, N., Martin-Curry, S., Martinez, C., Marz, J., Roberson-Smith, B., Vrba. (1993). Teaching age-appropriate purposeful skills: Comprehensive assessment and ongoing evaluation booklet. (2nd Ed.). Texas School for the Blind and Visually Impaired, Austin, TX: Morgan Printing. These booklets may be ordered from: Texas School for the Blind, Business Office, 1100 West 45th Street, Austin, TX 78756-3494 512- 454-8631.
Smith, A. J., O'Donnell, B. (1992). Beyond arm's reach: Enhancing distance vision. Philadelphia, PA: Pennsylvania College of Optometry Press.
The cultural background of children and their families affects their behavior and interactions in unique ways. Cultural influences include ethnic background, socioeconomic group, age and gender. Although one's culture shapes and influences behavior, it does not necessarily determine it. In other words, it is important to look at individuals and families within a particular culture. For example, consider the following Latino families: Mr. and Mrs. Chavez are originally from Mexico, speak Spanish at home, did not complete high school, and their two children are first generation American. The Chavez family lives in an urban two bedroom apartment which they share with close relatives. The Gimenez are originally from Chile; while they speak Spanish at home, they are also proficient in English. Both parents have graduate degrees from American universities. Their two children are first generation American, and they all live in a middle class suburban home. While these families have some commonalities, their individual differences illustrate the importance of not making generalizations. At the heart of cultural sensitivity lies the ability to keep an open mind and to take the time to observe and listen while remaining nonjudgmental. By understanding the cultural influences of the students we serve, we can improve the quality of both assessment and intervention strategies.
As O&M Instructors we need to reflect on our own preconceived ideas about members of other cultures. By continually examining our own beliefs and expectations regarding ourselves and others, we are taking a critical step toward developing greater cultural sensitivity. We also need to try to learn as much as possible about the families with which we work. Initial sources of information might include social workers/case managers, internet resources, community organizations, as well as individuals with knowledge/ personal experience with a particular culture. O&M instructors would benefit from learning about family values in various areas including
Perception of disability/perceived cause of visual impairments (e.g., medical vs. religious reasons).
Definition and value assigned to independence (e.g., independence vs. interdependence).
Roles and involvement of family members (e.g., some cultures place greater emphasis on wisdom from age and defer to elders for decision making).
Attitude toward authority (e.g., go along with the instructor's recommendations based on their respect for authority even if they conflict with their own values/beliefs).
Etiquette (e.g., accepting gifts, use of first names, eye contact).
Time orientation (e.g., punctuality for appointments).
Additional sensitivity strategies:
Take advantage of informal interviews to learn about the family and allow them to get to know you, thus developing a personal relationship before engaging in professional assessment and instructional activities.
Use the family's primary language for important oral and written communication (e.g., developing IEP goals, discussing progress), involving an interpreter when necessary.
Determine "who is who" within the family to identify key members who need to be involved in helping develop goals and needs.
Discuss options for O&M instruction, keeping in mind that total independence may not be the family's ultimate goal.
When in doubt about how to conduct yourself, respectfully ask family members.
Avoid technical jargon when explaining or discussing different aspects of O&M.
Invite family members to participate in the O&M process as much as they would like or are able to.
Not only is each family unique, but their interactions with the mobility instructor are affected by the instructor's cultural background as well. For example, an Asian family may find it easier to relate to a member of another minority (e.g., Latino) rather than to someone from the dominant culture, since they may feel they share similar experiences related to their minority status.
In conclusion, it is essential to approach each family with heightened sensitivity and a willingness to build a relationship based on an appreciation of individual differences and mutual respect.
References:
Bau, A. M. (1999). Providing culturally competent services to visually impaired persons. Journal of Visual Impairment & Blindness, 93(5), pg. 291 - 297.
Cohen, R., Harrell, L., Macon, C., Moedjono, S., Orrante, L., Pogrund, R., & Sacks, S. (1992). Family focus: Working with families of young blind and visually impaired children. In R. L. Pogrund, D. L. Fazzi, & J. S. Lampert (Eds.), Early Focus. Working with Young Blind and Visually Impaired Children and Their Families. NY: AFB Press
Minnesota Public Health Association Immigrant Health Task Force. (1996, August). Six steps toward cultural competence: How to meet the health care needs of immigrants and refugees. (Available from Refugee Health Program, Minnesota Department of Health, 717 Delaware Street S.E., Minneapolis, MN 55440
The National Beep Baseball Association (NBBA) www.nbba.org
United States Braille Chess Association (USBCA) www.crisscrosstech.com
Space Camp for Interested Visually Impaired Students (SCIVIS) www.tsbvi.edu
Descriptive Video Service (DVS) http://main.wgbh.org/wgbh/access/
The Hadley School for the Blind (Free correspondence courses available for individuals with or without visual impairments) www.hadley-school.org/Web_Site/hadley-School.asp
United States Blind Golf Association (USBGA) www.blindgolf.com
United States Association of Blind Athletes (USABA) www.usaba.org
Blind Outdoor Leisure Development (BOLD) www.challengeaspen.com
The Campanian Society (Organizes travel programs for individuals with visual impairments) www.campanian.org
International Bicycle Tours (Coordinates and leads bike tours in the United States and abroad providing accommodations for individuals with visual impairments) www.internationalbicycletours.com
American Blind Bowling Association (ABBA) www.geocities.com/blindbowlers/abba
Fishing Has No Boundaries, Inc. www.fhnbinc.org
North American Riding for the Handicapped Association, Inc. (NARHA) www.narha.org
Achilles Track Club (Long distance running) www.achillestrackclub.org
Ski for Light, Inc. (cross country skiing) www.sfl.org
The National Library of Congress National Library Service for the Blind and Physically Handicapped (NLS) www.loc.gov/nls/
Very Special Arts (VSA) (Art programs for children and adults with all types of impairments, with activities including creative writing, dance, drama and music) www.vsarts.org
Mobility International, USA (Coordinates summer exchange programs and provides information on traveling in the US and abroad) www.miusa.org
Because this information changes, check the Internet for a given school before discussing it with your student. You can find an updated school list at www.gdui.org
Eye of the Pacific Guide Dogs and Mobility Services 747 Amana Street, #407, Honolulu, HI 96814 808-941-1088 www.eyeofthepacific.org
Fidelco Guide Dog Foundation, Inc. 103 Old Iron Ore Rd. Bloomfield, CT 06002 860-243-5202 http://www.fidelco.org
Freedom Guide Dogs for the Blind 1210 Hardscrabble Road Cassville, NY 13318 315-822-5132 http://www.freedomguidedogs.org/
Guide Dogs for the Blind, Inc. (California Campus) P. O. Box 151200 San Rafael, CA 94915-1200 800-295-4050 http://www.guidedogs.com
Guide Dogs for the Blind (Oregon Campus) 32901 S.E. Kelso Rd. Boring, OR 97009 503-668-2100 http://www.guidedogs.com
Guide Dog Foundation for the Blind, Inc. 371 East Jericho Turnpike Smithtown, NY 11787-2976 800-548-4337 http://www.guidedog.org
Guide Dogs of America 13445 Glenoaks Blvd. Sylmar, CA 91342 800-459-4843 http://www.guidedogsofamerica.org
Guide Dogs of the Desert, Inc. P.O. Box 1692 Palm Springs, CA 92263 760-329-6257 http://www.guidedogsofthedesert.com
Guide Dogs of Texas, Inc. (Texas only) Mr. Larry Tuttle, Executive Director Guide Dogs of Texas, Inc. 11825 West Avenue Suite 104 San Antonio, TX 78216 210-366-4081 Toll Free in TX: 800-831-9231 http://www.guidedogsoftexas.org/
Guiding Eyes for the Blind, Inc. 611 Granite Springs Rd. Yorktown Heights, NY 10598 800-942-0149 http://www.guidingeyes.org/site/PageServer
Leader Dogs for the Blind, Inc. P.O. Box 5000 Rochester, MI 48308-5000 888-777-5332 http://www.leaderdog.org
Pilot Dogs, Inc. 625 W. Town St. Columbus, OH 43215-4496 614-221-6367 http://www.pilotdogs.org
The Seeing Eye, Inc. P.O. Box 375 Morristown, NJ 07963-0375 800-539-4425 http://www.seeingeye.org
Southeastern Guide Dogs, Inc. 4210 77th St. East Palmetto, FL 34221 800-944-36470 http://www.guidedogs.org/
Guide Dog Users, Inc. 14311 Astrodome Drive Silver Spring, MD 20906-2245 888-858-1008 http://www.gdui.org/
The following five appendices include:
Appendix A: an explanation and a list of token characters used in the software
Appendix B: a list of General Strategies for Promoting Independence for students with visual impairments used in the software
Appendix C: a list of General Strategies for Promoting Independence for students with Additional impairments used in the software
Appendix D: a list of Specific Activities for Promoting Independence used in the software
Appendix E: a sample of a completed O&M Family Booklet
As noted throughout the manual, the words enclosed in brackets that you find in edit fields are referred to as tokens. When you are editing text for a booklet, tokens show you the label for the piece of instructor or student information that will be inserted at that point by the program.
If you do not want the specific information (such as student's first name) inserted, delete the token from right to left, starting with the right bracket and ending with the left. After deleting a token, you can type in any other word that you would like to see in the booklet instead of the information indicated by the token. For instance, if you would like to write "your Child" instead of the child's first name, you would delete the [StudentFirstName] token by moving your cursor to the space just after the right bracket symbol and back-spacing over the token all the way through the left bracket symbol. Then you would type "your child" where the token had been.
Although not advisable unless you are somewhat skilled in the use of technology and software, you can also replace one token with another when editing. For instance, if you want the software to use the student's middle name instead of his first, you could delete StudentFirstName when it occurs between brackets in the text you are editing and write in StudentMiddleName between the brackets. Wherever you write StudentMiddleName between these brackets, the program would insert the student's middle name into the booklet.
The following is a list of all tokens used in the software. These stand for pieces of information that you have written into forms or dialogs about yourself or your student. Many of these pieces of information are inserted into the booklet text more than once at various points.
[BookletDate]
CopyrightText]
[StudentID]
[StudentFirstName]
[StudentMiddleName]
[StudentLastName]
[StudentAge]
[InstructorFirstName]
[InstructorMiddleName]
[InstructorLastName]
[InstructorOfficePhoneNumber]
[InstructorOfficeCallTime]
[InstructorOfficeEmail]
[InstructorCellPhoneNumber]
[InstructorCellCallTime]
[InstructorHomePhoneNumber]
[InstructorHomeCallTime]
[InstructorHomeEmail]
[PicFileName]
[PicCaption]
[InstructorCerts]
[InstructorAgency]
[InstructorAddressBlock]
[InstructorAddressLine]
Material in this Appendix uses the name Angela instead of the token character to enhance readability.
Teachable Moments: Be on the lookout for teachable moments so you can take advantage of a situation or object, novel to Angela. For example, on your way to the drugstore with Angela, you may notice a large fallen tree and realize this is a unique opportunity for Angela to explore a tree from its roots to the top branches at close range. A common occurrence, a stop at the gas station, can become a great opportunity for learning. You may be able to take a few extra minutes to discuss how gas pumps work and their common features; if appropriate, you can encourage Angela to assist in tasks such as pumping gas or cleaning the windshield.
Sensory Experiences: Experiences that involve different senses help children understand the world around them. For example, when you are in a place with various surface textures (e.g., a mall or hiking path), point out and discuss their names (e.g., carpet, tile, rug, or dirt) and their possible functions (e.g., rugs at entrance/exit doors, large metal grates for drainage, dirt paths). Also, you can help Angela recognize various environments such as drug stores, banks, supermarkets or bus stops by asking what Angela hears or smells and discussing where those sounds or smells come from and what they mean.
Active Traveling: Often children with visual impairments do not take active roles in traveling. To encourage participation, provide opportunities for Angela to practice giving directions in familiar environments. After modeling how to get to a nearby destination (e.g., neighbor's house, friend's apartment in your building, mailbox, corner store, etc.) a number of times, have Angela be the one in charge of giving directions or indicating which way to go. Allow Angela the opportunity to make mistakes since mistakes are an important part of learning. These types of experiences promote problem solving abilities which in turn build confidence.
Everyday Environments: The goal is to seek opportunities to help Angela learn something new and become more independent. Think about your day's activities and select those that can be turned into learning experiences. For example, if you are waiting in line at the post office, you could discuss with Angela elements of the post office, such as post office boxes, stamp machines, and so forth. You could explain what they are, how they work, what they look like, where they are located and explore them together before leaving. Perhaps on another visit, Angela might be able to get stamps independently or assist in the process of doing so. In another scenario, if using public transportation, you could discuss fares, types of stops (e.g., bus shelter vs. pole), names of stops, where to sit, etc. Depending on Angela's level of ability and previous experiences, you may consider having Angela participate in different aspects of the trip.
Activity Recall: To help Angela learn the most from everyday activities, you can use pretend play to revisit previous experiences. This may provide an opportunity to clarify or expand Angela's understanding of what occurred. For example, if you recently had food delivered to your home, Angela can take the role of the person ordering or delivering food and go through the various aspects of the process with you.
Chores and Responsibilities: Household chores provide excellent opportunities to develop independence and responsibility. Regardless of Angela's age and abilities, there are many tasks to choose from. For example, a younger child can put toys away or help set the table, while an older child may be able to take out the trash or do the laundry. Other activities may include gardening, raking leaves, washing the car and shoveling snow.
A Taste of Adventure: Whenever possible, plan family activities that involve new environments or situations to increase Angela's experience of the world. Depending on your family's interests, you could plan a trip to a museum, take a ferry ride, or go camping. At any new place, help Angela explore the new environment; and provide information that would enhance Angela's understanding of it. It may be worthwhile to call ahead of time to find out what special services/accommodations can be provided to make the experience more meaningful for Angela. For example, at a theatrical event, Angela may be offered a seat in the front row or a tour of the back stage to enhance the experience. In another example, if Angela has never been to a ballgame, this could be an exciting adventure. Depending on Angela's level of ability, you could discuss and show Angela the physical environment including bleachers, the field, location of the snack bar, etc. Understanding how the game is played and what people do to support their team can also be incorporated.
Physical Activity: Participating in physical activities (e.g., hiking, swimming, wrestling, dancing, running, and martial arts) is important for all children, especially those with visual impairments. Benefits include general health; opportunities to learn more about body movements and positional concepts (e.g., above, below, between, behind); and development of muscle strength, posture, coordination, and self-confidence. Also, when children are playing games, they have more opportunities to socialize with peers and develop friendships. You may explore what your local area has to offer regarding sports and recreation activities for children with disabilities. These may include therapeutic horseback riding, sensory trails, and adapted skiing.
Body Language: Often children with visual impairments do not have the benefit of observing and imitating others. As a result, you may need to teach Angela how to use gestures and body language appropriately. For example, Angela might benefit from learning how to nod for yes and shake the head for no, wave goodbye, shrug the shoulders, or shake hands when meeting somebody new. Also, you may need to provide feedback to point out what Angela may have missed or not considered in a particular situation. Most children respond to honest but encouraging comments. For example, on your way to the corner store with Angela, you stop to talk with your neighbor, Mr. Jones. You notice that Angela says hello in a friendly tone, but does not turn and face the person while doing so. Afterwards, you can say, "I loved the way you greeted Mr. Jones. You were so friendly! Try facing him next time when you talk with him. Most people look at each other's faces when they talk."
Show and Tell: Periodically ask what Angela is learning during O&M lessons. Pretend that Angela is the mobility instructor and is teaching you (the student) the new skill or concept. A variation of this activity is a "show and tell" time, where Angela shows you new mobility skills.
Advocacy: Children who are aware of their needs and can communicate them appropriately are in a better position to advocate for themselves. In everyday situations, you may encourage Angela to ask and answer questions directly, as much as possible. For example, an adult may ask you a question such as what Angela wants to drink. You may remain silent, waiting for Angela to answer or you may prompt Angela to respond directly. In addition, you and the teacher can work together to help Angela better understand the nature of Angela's condition(s) and the adaptations needed to function the best Angela can in various circumstances. There are many opportunities for advocacy when preparing for upcoming Individualized Education Plan (IEP) meetings. At home, you may ask Angela to reflect about strengths, needs, goals, and ways Angela can participate in the IEP process. Some children feel comfortable sharing their thoughts at the meeting while others need or prefer to do it differently, such as via a video clip or a written statement. It is a good idea to do this in collaboration with Angela's teachers/guidance counselor.
Trailing: For some children, physical exploration of the environment is critical for learning concepts or remaining oriented, knowing where they are. Indoors, whether Angela is walking or using a stroller or wheelchair, have Angela stay close to the wall rather than in the middle of the hallway whenever possible. That way Angela may be able to use a hand to follow or trail walls, explore objects, and stay oriented. Also, consider reversing routes on the same side of the wall to help Angela have a better understanding of Angela's position along the way. If possible, challenge Angela to predict what objects and landmarks are coming up next, once the route has become familiar.
Material in this Appendix uses the name Angela instead of the token character to enhance readability.
Teachable Moments: Be on the lookout for teachable moments so you can take advantage of a situation or object, novel to Angela. For example, on your way to the drugstore with Angela, you may come across a car parked blocking the sidewalk. When you are physically guiding Angela (e.g., walking, using wheelchair or stroller), take the opportunity to bring Angela to the car and discuss its location and why it may be parked there. Also, if possible, have Angela help come up with ways to move around it. Similarly, construction sites can be used for exploration and discussion (e.g., construction horses, yellow warning tape, machinery sounds).
Sensory Experiences: It is important to provide experiences that involve different senses. For example, have Angela experience various surface textures (e.g., carpet, tile, grass, cement, dirt) whether walking or in a wheelchair/stroller. If you are pushing the stroller/wheelchair, you can play a game where you purposely veer off the path and have Angela catch you doing it by saying stop, raising an arm or signaling in some other way.
Active Traveling: Often children with visual impairments do not take active roles in traveling. To encourage participation, provide opportunities for Angela to practice giving directions in familiar environments. After modeling how to get to a nearby destination (e.g., neighbor's house, friend's apartment in your building, mailbox, corner store, etc.) a number of times, have Angela be the one in charge of giving directions or indicating which way to go. Keep in mind there are multiple ways for Angela to indicate the desired direction of travel besides speech. For example, Angela may use sign language, turn the head, raise the right or left arm, or use an augmentative communication device. Allow Angela the opportunity to make mistakes since mistakes are an important part of learning. These types of experiences promote problem solving abilities which in turn build confidence.
Everyday Environments: The goal is to seek opportunities to help Angela learn something new and become more independent. Think about your day's activities and select those that can be turned into learning experiences. For example, if you are waiting in line at the post office, you could discuss with Angela elements of the post office, such as post office boxes, stamp machines, and so forth. You could explain what they are, how they work, what they look like, where they are located and explore them together before leaving. Perhaps on another visit, Angela might be able to get stamps independently or assist in the process of doing so. In another scenario, if using public transportation, you could discuss fares, types of stops (e.g., bus shelter vs. pole), names of stops, where to sit, etc. Depending on Angela's level of ability and previous experiences, you may consider having Angela participate in different aspects of the trip.
Activity Recall: To help Angela learn the most from everyday activities, you can ask Angela to recall key aspects of what just took place. Prompt with questions if necessary. For example, if you went to the gas station, you might have Angela describe where the gas came from, where it went into the gas tank, how you paid for it, etc. This may provide an opportunity to clarify or expand Angela's understanding of what occurred. In another instance, if you just had food delivered to your home, discuss how it was ordered, who brought it to your home, and other aspects of the process. When appropriate, you can discuss how Angela may be able to take part in this activity in the future (e.g., selecting items from a menu, calling the store, etc.).
Chores and Responsibilities: Household chores provide excellent opportunities to develop independence and responsibility. If currently unable to perform the entire task independently, consider what aspects Angela may be able to carry out. For example, some children enjoy helping with the laundry by separating clothes by color, loading the washing machine, or transferring wet clothes to the dryer. Have Angela practice the task as much as necessary, gradually allowing for more independence until a routine is established. Praise and reinforcement will help Angela feel proud of this meaningful contribution to the family.
A Taste of Adventure: Whenever possible, plan family activities that involve new environments or situations to increase Angela's experience of the world. Depending on your family's interests, you could plan a trip to a museum, take a ferry ride, or go camping. At any new place, help Angela explore the new environment; and provide information that would enhance Angela's understanding of it. It may be worthwhile to call ahead of time to find out what special services/accommodations can be provided to make the experience more meaningful for Angela. For example, at a theatrical event, Angela may be offered a seat in the front row or a tour of the back stage to enhance the experience. In another example, if Angela has never been to a ballgame, this could be an exciting adventure. Depending on Angela's level of ability, you could discuss and show Angela the physical environment including bleachers, the field, location of the snack bar, etc. Understanding how the game is played and what people do to support their team can also be incorporated.
Physical Activity: Participating in physical activities (e.g., hiking, swimming, wrestling, dancing, running, and martial arts) is important for all children, especially those with visual impairments. Benefits include general health; opportunities to learn more about body movements and positional concepts (e.g., above, below, between, behind); and development of muscle strength, posture, coordination, and self-confidence. Also, when children are playing games, they have more opportunities to socialize with peers and develop friendships. You may explore what your local area has to offer regarding sports and recreation activities for children with disabilities. These may include therapeutic horseback riding, sensory trails, and adapted skiing.
Body Language: Often children with visual impairments do not have the benefit of observing and imitating others. As a result, you may need to teach Angela how to use gestures and body language appropriately. For example, Angela might benefit from learning how to nod for yes and shake the head for no, wave goodbye, or shake hands when meeting somebody new. When teaching how to shrug the shoulders to imply "I don't know," Angela can place hands on your shoulders to feel what you are doing while you explain the meaning of the gesture. Also, you may need to provide feedback to point out what Angela may have missed or not considered in a particular situation. Most children respond to honest but encouraging comments. For example, on your way to the corner store with Angela, you stop to talk with your neighbor, Mr. Jones. You notice that Angela says hello in a friendly tone, but does not turn and face the person while doing so. Afterwards, you can say, "I loved the way you greeted Mr. Jones. You were so friendly! Try facing him next time when you talk with him. Most people look at each other's faces when they talk." Also, some children may benefit from a discussion and demonstration of appropriate distance and physical contact for social interactions.
Show and Tell: Periodically ask what Angela is learning during O&M lessons. Pretend Angela is the mobility instructor and is teaching you (the student) the new skill or concept. If necessary, find out what took place (e.g., by talking with the orientation and mobility instructor or using a communication book) so that you can help Angela share with you what was learned.
Advocacy: Children who are aware of their needs and can communicate them appropriately are in a better position to advocate for themselves. In everyday situations, you may encourage Angela to ask and answer questions directly, as much as possible. For example, an adult may ask you a question, such as what Angela wants to drink. You may remain silent, waiting for Angela to answer or prompt Angela to respond directly. When necessary, children can use physical gestures (e.g., nod, shake the head) or pre-written cards to express what they want. You and the teacher can work together to help Angela better understand the nature of Angela's condition(s) and the adaptations needed to function the best Angela can in various circumstances. There are many opportunities for advocacy when preparing for upcoming Individualized Education Plan (IEP) meetings. At home, you may ask Angela to reflect about strengths, needs, goals, and ways Angela can participate in the IEP process. Some children feel comfortable sharing their thoughts at the meeting while others need or prefer to do it differently, such as via a video clip or a written statement. It is a good idea to do this in collaboration with Angela's teachers/guidance counselor.
Trailing: For some children, physical exploration of the environment is critical for learning concepts or remaining oriented, knowing where they are. Indoors, whether Angela is walking, or using a stroller or wheelchair, have Angela stay close to the wall rather than in the middle of the hallway whenever possible. That way Angela may be able to use a hand to follow or trail walls, explore objects, and know where Angela is. If unable to use the arm to trail the wall, Angela may use a soft object as an extension of the arm. Also, consider reversing routes on the same side of the wall to help Angela have a better understanding of Angela's position along the way. If possible, challenge Angela to predict what objects and landmarks are coming up next, once the route has become familiar.
Material in this Appendix uses the name Angela instead of the token character to enhance readability.
Date: 01/12/2010
Material contained in the software was written by
Fabiana Perla, COMS, and Betsy O'Donnell, COMS.
Hi.
I am Betsy O'Donnell, Angela's orientation and mobility (O&M) instructor.
You can reach me at the office Monday - Friday 8:00 a.m. - 4:30 p.m. at (888) 888-8888.
Or e-mail me at [email protected].
You can call my cell phone at (444) 444-4444.
My best cell call time is 7:00 p.m. - 8:00 p.m..
Days and times of our lessons are Monday 9:45 - 10:30 a.m.
I would like to keep in touch with you. Your ideas, suggestions and general input can help me a great deal in providing the best instruction for Angela. We can stay in touch via the telephone, E-mail, a communication book and so forth. At the end of the booklet, you will find the Family Contact Information Form and an envelope addressed to me. On this form, you can tell me how and when you would like to be contacted. Please complete and return this form to me at your earliest convenience.
To increase your knowledge and understanding of Angela's O&M skills and needs
To help promote Angela's independence and understanding of the environment
To improve communication and share information regarding Angela's orientation and mobility abilities and needs
Information about O&M in general and the different areas of instruction
Specific details about Angela's travel skills
Basic information about Angela's eye condition
A description of Angela's current mobility skills
General strategies and specific activities for promoting Angela's independence
The goal of orientation and mobility (O&M) instruction is to enable Angela to travel safely, efficiently and as independently as possible in different environments such as the home, school and community. To achieve this goal, instruction may be provided in the following areas:
Concept development: Awareness and identification of body parts and movement are important components of orientation and mobility instruction. In addition, learning about positional concepts (e.g., between, middle) as well as common environmental objects and their functions enable children to better understand their surroundings.
Motor development: Movement is a key component of orientation and mobility. It is important to create a safe and stimulating environment for children to develop good motor skills. Appropriate motor development includes gross and fine motor skills as well as balance, posture and gait. For those with multiple disabilities, the use of adaptive devices and specific techniques may be necessary to enable them to move around and interact with the environment.
Sensory development: When vision is affected, effective use of the senses (hearing, touch, smell and vision) becomes critical in better understanding the environment. For example, children can learn to identify the street corner by noticing cues such as a downward slope, the end of the building line, traffic or pedestrian sounds and changes in wind and temperature.
Visual skills: Children can learn how to make better use of their functional vision, in combination with their other senses as well as with devices such as telescopes or sunglasses. Instruction may be provided in areas such as systematically locating targets in the environment, making better use of visual cues to detect and negotiate curbs and steps, and learning to select and use appropriate visual landmarks to remain oriented while traveling.
Social skills: Being able to effectively interact with others is an important part of independent travel. Some social skills may be difficult to acquire when children cannot visually imitate other people's gestures and body language. Social skills include making eye contact, facing people while talking to them, shaking hands and soliciting or politely refusing assistance. O&M lessons in different community settings provide invaluable opportunities to work on a variety of social skills.
Techniques of orientation and mobility: Traveling safely and efficiently involves the use of specific O&M techniques and strategies. Some of them include walking with a guide, learning various cane skills, as well as traveling in a variety of environments (residential, small business and downtown areas) and using public transportation.
Use of devices: Devices such as Global Positioning Systems (GPS), optical devices, Electronic Travel Devices (ETD's) and amplification systems may be useful in enhancing a child's understanding of the world around him or her, assist with orientation, and provide greater access to information among other benefits.
Name of student: Angela Boardman.
Age: 6 years old.
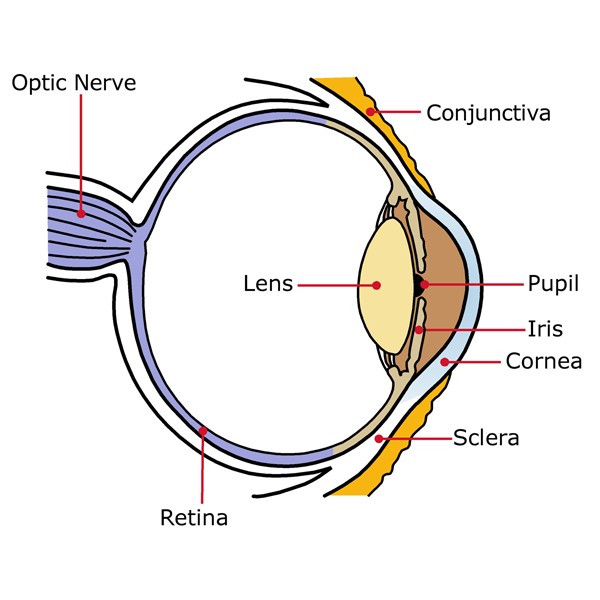
Conjunctiva: clear, mucus membrane that covers the inside of the eyelids and parts of the eyeball.
Sclera: tough white opaque outer covering of the eye that protects the inner contents from most injuries.
Cornea: clear, spherical-shaped structure in the front of the eyeball that allows light to enter the eye.
Iris: colored portion of the eye that expands or contracts to control the amount of light entering the eye.
Pupil: black circular opening in the center of the iris that regulates the amount of light that enters the eye. The pupil gets larger in dim light and smaller in bright light.
Lens: transparent oval-shaped tissue behind the iris (colored part) of the eye. The lens focuses images onto the retina in the back of the eye. The lens changes its shape to focus close or distant images onto the retina.
Retina: light-sensitive tissue in the back of the eye, which changes what we see into a form that can be interpreted by the brain.
Optic nerve: a bundle of delicate fibers that relay information from the retina to the brain.
Visual acuity refers to the ability to distinguish detail at different distances. When expressed as a fraction (e.g., 2/200), the top number represents the distance from the target (e.g., eye chart) and the bottom number indicates the size of the smallest symbol that can be identified. For example, 2/200 visual acuity indicates that at a distance of 2 feet, a person can distinguish nothing smaller than the 200 size letter (big "E" on a regular eye chart).
Angela has no vision in the left eye.
Visual field refers to how much of an area a person can see without moving the head or eyes. A full visual field includes intact central and peripheral (side) areas of vision.
Central or Macular Field: This area corresponds to central vision, which is responsible for seeing detail and distinguishing colors. For example, it enables us to perform everyday activities such as reading small print, watching TV, and identifying faces.
Peripheral Field: This area corresponds to peripheral vision. It enables us, for example, to avoid obstacles, detect movement, and travel at night or in dimly lit areas. When using peripheral or side vision, we may notice something moving out of the corner of our eye without looking directly at it.
Angela's Visual Fields:
According to a low vision examination performed on 5-12-2009 by Dr.
Susan Brown from the Children's Eye Hospital, Angela's visual field in the right eye was evaluated using a confrontation strategy.
Her visual field appeared to be constricted to approximately 40 degrees.
Depth perception is the combined use of both eyes to achieve three-dimensional vision. Depth perception problems may occur when a person is monocular (uses one eye), has different visual acuities in each eye or when vision is severely reduced. Common problems in this area include misjudging distances and difficulty detecting or negotiating steps and curbs.
Optical and electronic devices are designed to enlarge an image or object that would be otherwise hard to see. Some of these devices help students see objects that are at close range, such as books, magazines, photographs and maps. Others are designed for activities at intermediate or distance range, such as reading a computer screen or a street sign or watching TV. If Angela has an optical or electronic device and is having difficulty using it, please contact me so we can discuss this further.
Video magnifiers are electronic devices that use a camera to capture text or other items and project them onto a monitor or screen. Depending upon the design, they may be used to read a bus schedule, view a map or check the price of an item at a store. Most video magnifiers allow students to adjust magnification, contrast, brightness, and even change the colors of the screen. While some video magnifiers are heavy and meant to be stationary, others are lightweight and portable, making them ideal for mobility.
These devices come with specific instructions from the manufacturers for their care and optimal use. Request a manual from the supplier if necessary.
Angela has a CCTV that she uses at school.
Angela is working towards achieving the following O&M goals this year.
Angela will:
Identify five new positional concepts (e.g., above, below, beside, middle, right, left).
Improve her visual efficiency by working on visual memory, attention to detail and
visual closure (i.e., ability to identify an object when part of it is missing).
Use a long cane to travel outdoors or in unfamiliar environments.
Teachable Moments: Be on the lookout for teachable moments so you can take advantage of a situation or object, novel to Angela. For example, on your way to the drugstore with Angela, you may notice a large fallen tree and realize this is a unique opportunity for Angela to explore a tree from its roots to the top branches at close range. A common occurrence, a stop at the gas station, can become a great opportunity for learning. You may be able to take a few extra minutes to discuss how gas pumps work and their common features; if appropriate, you can encourage Angela to assist in tasks such as pumping gas or cleaning the windshield.
Everyday Environments: The goal is to seek opportunities to help Angela learn something new and become more independent. Think about your day's activities and select those that can be turned into learning experiences. For example, if you are waiting in line at the post office, you could discuss with Angela elements of the post office, such as post office boxes, stamp machines, and so forth. You could explain what they are, how they work, what they look like, where they are located and explore them together before leaving. Perhaps on another visit, Angela might be able to get stamps independently or assist in the process of doing so. In another scenario, if using public transportation, you could discuss fares, types of stops (e.g., bus shelter vs. pole), names of stops, where to sit, etc. Depending on Angela's level of ability and previous experiences, you may consider having Angela participate in different aspects of the trip.
Chores and Responsibilities: Household chores provide excellent opportunities to develop independence and responsibility. Regardless of Angela's age and abilities, there are many tasks to choose from. For example, a younger child can put toys away or help set the table, while an older child may be able to take out the trash or do the laundry. Other activities may include gardening, raking leaves, washing the car and shoveling snow.
A Taste of Adventure: Whenever possible, plan family activities that involve new environments or situations to increase Angela's experience of the world. Depending on your family's interests, you could plan a trip to a museum, take a ferry ride, or go camping. At any new place, help Angela explore the new environment; and provide information that would enhance Angela's understanding of it. It may be worthwhile to call ahead of time to find out what special services/accommodations can be provided to make the experience more meaningful for Angela. For example, at a theatrical event, Angela may be offered a seat in the front row or a tour of the back stage to enhance the experience. In another example, if Angela has never been to a ballgame, this could be an exciting adventure. Depending on Angela's level of ability, you could discuss and show Angela the physical environment including bleachers, the field, location of the snack bar, etc. Understanding how the game is played and what people do to support their team can also be incorporated.
Physical Activity: Participating in physical activities (e.g., hiking, swimming, wrestling, dancing, running, and martial arts) is important for all children, especially those with visual impairments. Benefits include general health; opportunities to learn more about body movements and positional concepts (e.g., above, below, between, behind); and development of muscle strength, posture, coordination, and self-confidence. Also, when children are playing games, they have more opportunities to socialize with peers and develop friendships. You may explore what your local area has to offer regarding sports and recreation activities for children with disabilities. These may include therapeutic horseback riding, sensory trails, and adapted skiing.
Body Language: Often children with visual impairments do not have the benefit of observing and imitating others. As a result, you may need to teach Angela how to use gestures and body language appropriately. For example, Angela might benefit from learning how to nod for yes and shake the head for no, wave goodbye, shrug the shoulders, or shake hands when meeting somebody new. Also, you may need to provide feedback to point out what Angela may have missed or not considered in a particular situation. Most children respond to honest but encouraging comments. For example, on your way to the corner store with Angela, you stop to talk with your neighbor, Mr. Jones. You notice that Angela says hello in a friendly tone, but does not turn and face the person while doing so. Afterwards, you can say, "I loved the way you greeted Mr. Jones. You were so friendly! Try facing him next time when you talk with him. Most people look at each other's faces when they talk."
Show and Tell: Periodically ask what Angela is learning during O&M lessons. Pretend that Angela is the mobility instructor and is teaching you (the student) the new skill or concept. A variation of this activity is a "show and tell" time, where Angela shows you new mobility skills.
| My Name: | Betsy O'Donnell, Certified O&M Specialist (COMS), MS of Ed |
| Work Address: |
Children's Center for the Visually Impaired
800 Dale Avenue
Spring, Pennsylvania 11111
United States
|
| Office Phone: | (888) 888-8888 |
| Office Email: | [email protected] |
| Office Fax: | (555) 555-5555 |
| Cell Phone: | (444) 444-4444 |
Dear Parent, Guardian or Family member:
Please fill in this form and return it to me with Angela or by mailing it to my address on the Instructor Contact page. I would like to hear your thoughts and ideas about Angela's orientation and mobility needs.
Your Name: _______________________________________
Relationship to Child: ___________________________
Your Address: ____________________________________
City, State, Zip: ________________________________
Home Phone: ______________________________________
Best Times to Call: ______________________________
Work Phone: ______________________________________
Best Times to Call: ______________________________
Cell Phone: ______________________________________
E-mail Address: __________________________________
Questions and Ideas: _____________________________